

Installing Ubuntu Server 20.04
Your guide to installing Ubuntu Server 20.04, painlessly.


Introduction
Ubuntu is undoubtedly one of the most popular Linux Distro out there. It is quite common for someone charting Linux waters to dive into Ubuntu at one point in time, even if it is just to check what it tastes like. But there is not just one Ubuntu out there. There are actually five.
- Ubuntu Cloud
- Ubuntu Core
- Ubuntu Kylin
- Ubuntu Desktop
- Ubuntu Server
In this blog, I will help you install Ubuntu Server. Let's get started.
Why Ubuntu Server?
You might have heard about the Debian-based operating system Ubuntu at some point in your life. But now, what is this Ubuntu Server?
Ubuntu.com defines Ubuntu Server as:
Ubuntu Server is a variant of the standard Ubuntu you already know, tailored for networks and services. It’s just as capable of running a simple file server as it is operating within a 50,000 node cloud.
The difference is, Ubuntu Desktop comes with a Desktop Environment along with some other applications that make operating it easier, like a visual file manager, a music player, a web browser, a text editor, but on the other hand, Ubuntu Server does not come with any of this bundled with the installation file all it has, is a terminal window.
If you are unsure if Ubuntu Server is the right choice for you, read this article.
GUI can be installed on Ubuntu Server after installing the necessary packages, if that what you are comfortable with, but with it comes additional memory utilization, meaning, your server will have to struggle a little more to run smoothly. So if you are not comfortable with the command-line interface, you can always switch to the GUI version of the server.
Hardware Requirement
Since there is minimal GUI in the default Ubuntu Server installation, the hardware requirements are minimal. But then again, it depends on what kind of server applications you are going to run on it. Some applications demand high resources and might need a system with better configuration to run it, while others might run perfectly on the minimum required system configuration. You also won't need a mouse or even a keyboard and a monitor after you have successfully installed the OS on your system. The OS image file for the Ubuntu server is just 1.1 GB compared to the 2.7 GB for the Ubuntu Desktop, and the minimum hardware requirements are:
- RAM: 1 GB
- CPU: 1 GHz
- Storage: 2.5 GB disk space (You'll probably need more)
This means that you can easily pick a system from the last decade and turn it into your server.
Download
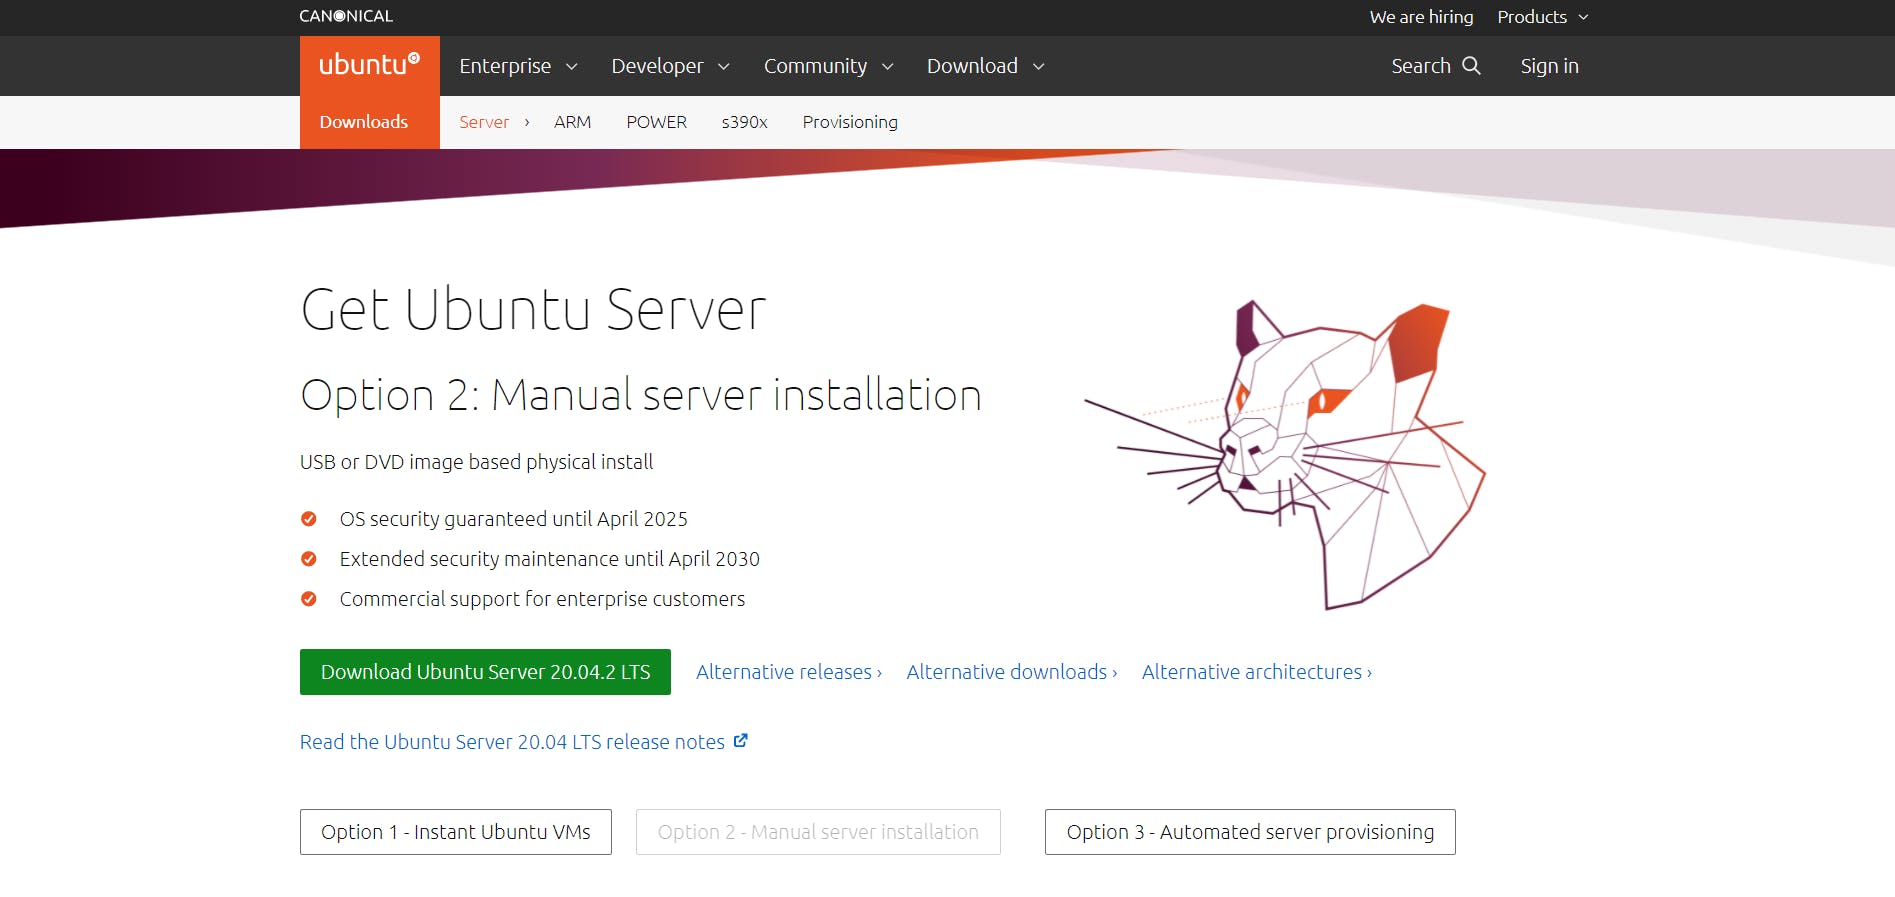
You can head on to the official Ubuntu website and download the image. The page has three options. We'll be using Option 2: Manual Server Installation.
Burn your disc
Now that you have the ISO image file for Ubuntu Server, you need to copy it on a disk to install it on your server system. I usually prefer Rufus to make a bootable device since it allows me to burn the image to a flash drive as well. But there is nothing wrong if you still want to stick to the traditional CD-ROM.
Installation
Now that all your pre-installation needs have been fulfilled, let's dive into the installation process.
Step 1: Booting In
Plug your device into your USB port (or if you are using a CD-Drive, put it in your optical disk drive) and restart your PC. You should reach a page that looks somewhat like this:

If that does not happen, you might want to refer to this article. There may not be anything wrong with your PC, rather just some security settings enabled in the BIOS.
Step 2: Language Selection
You'd now be on the installation page of the Ubuntu server. As discussed before, the Ubuntu server has an insubstantial GUI presence, and your installation experience would be similar. You would not be able to use your mouse on Ubuntu Server installer. It is how it is. All you need is your keyboard and your screen.
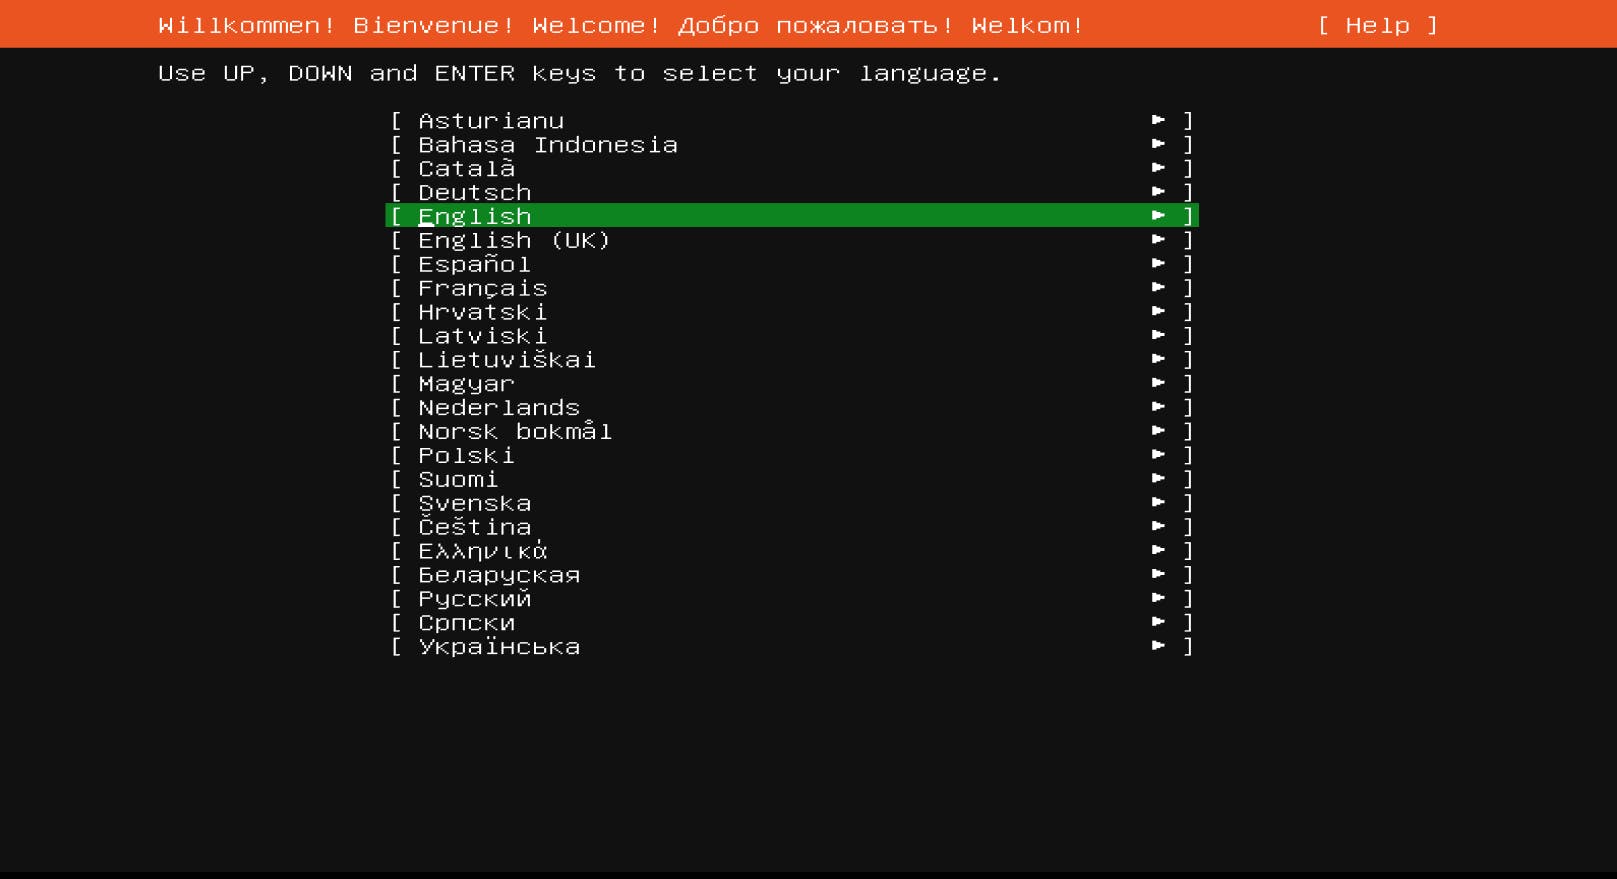
Select your preferred language, navigate and confirm it using your keyboard's Up, Down, and Enter keys.
Step 3: Keyboard Configuration Selection
Select the correct keyboard configuration setting based on the type of keyboard you are using. In most cases, it is automatically detected, but if it does not, you can always select whichever suits you. If you are unsure, you can go with the default options and then change them when you are sure, after the installation.

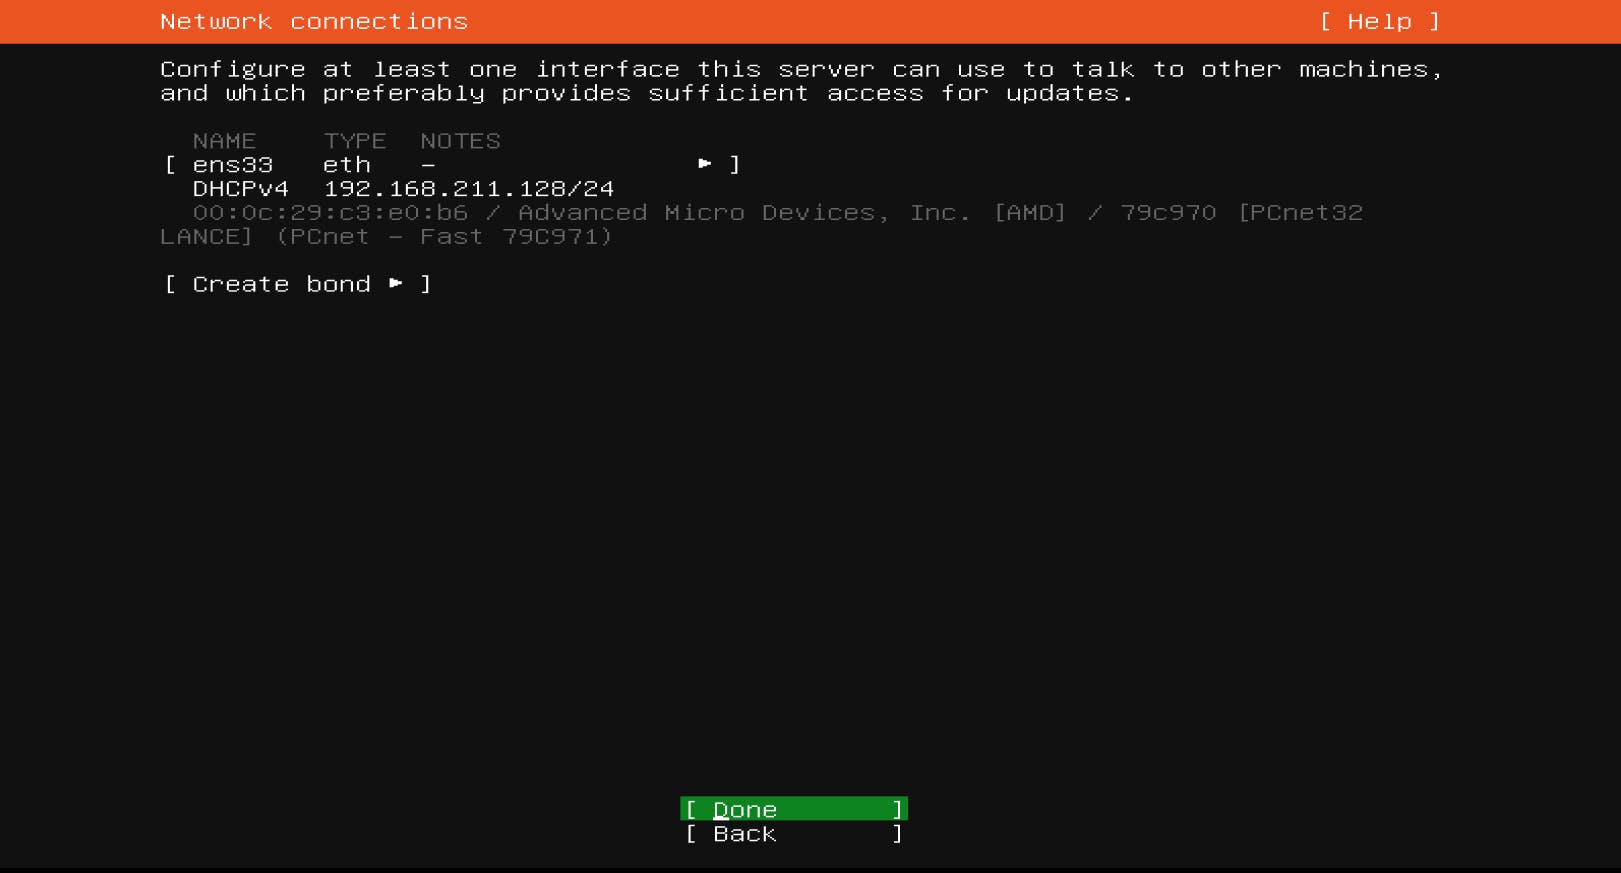
Step 4: Network Connection Settings
You'll now need to configure the network settings for your server. The default setting is automatically applied using DHCP, but you might want to use something else for setting up a server with a public static IP address. If you are unsure, you would want to consult with your network administrator.
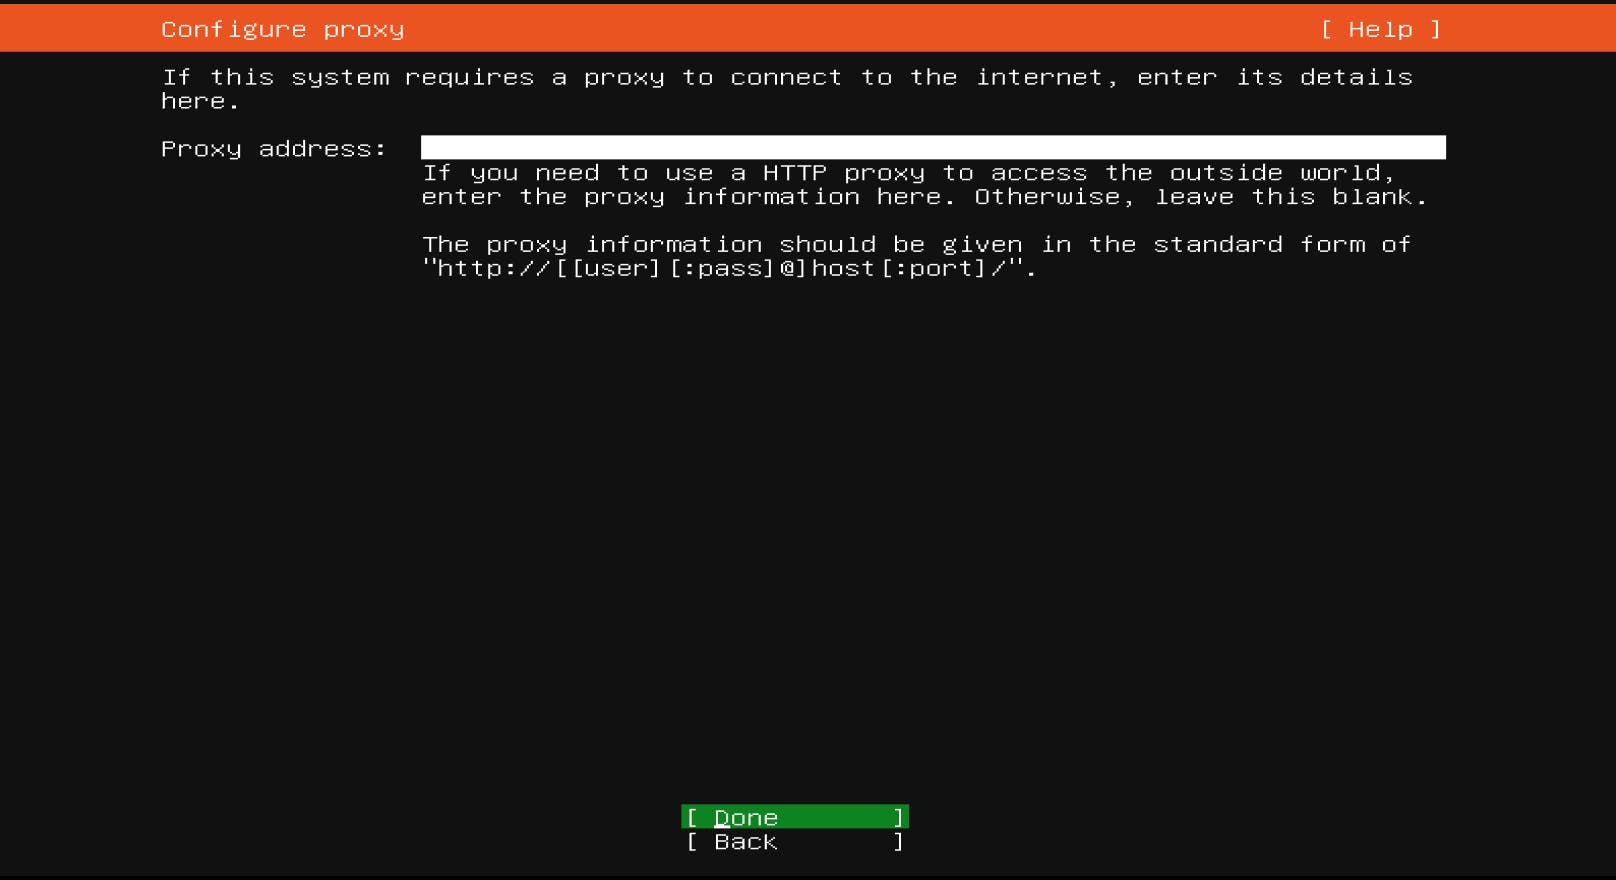
Step 5: Configuring Proxy
If you or your organization uses a proxy for accessing the internet, this is the time you set it up. If you are unsure about this step, you can skip it.
Step 6: Configure Ubuntu Archive Mirrors
Mirror sites or mirrors are replicas of other websites or any network node.
Using this, you can select a replica that is closer to your physical location for faster download speeds. The best mirror might already have been selected by the installation software, but you can always change it if you are not satisfied.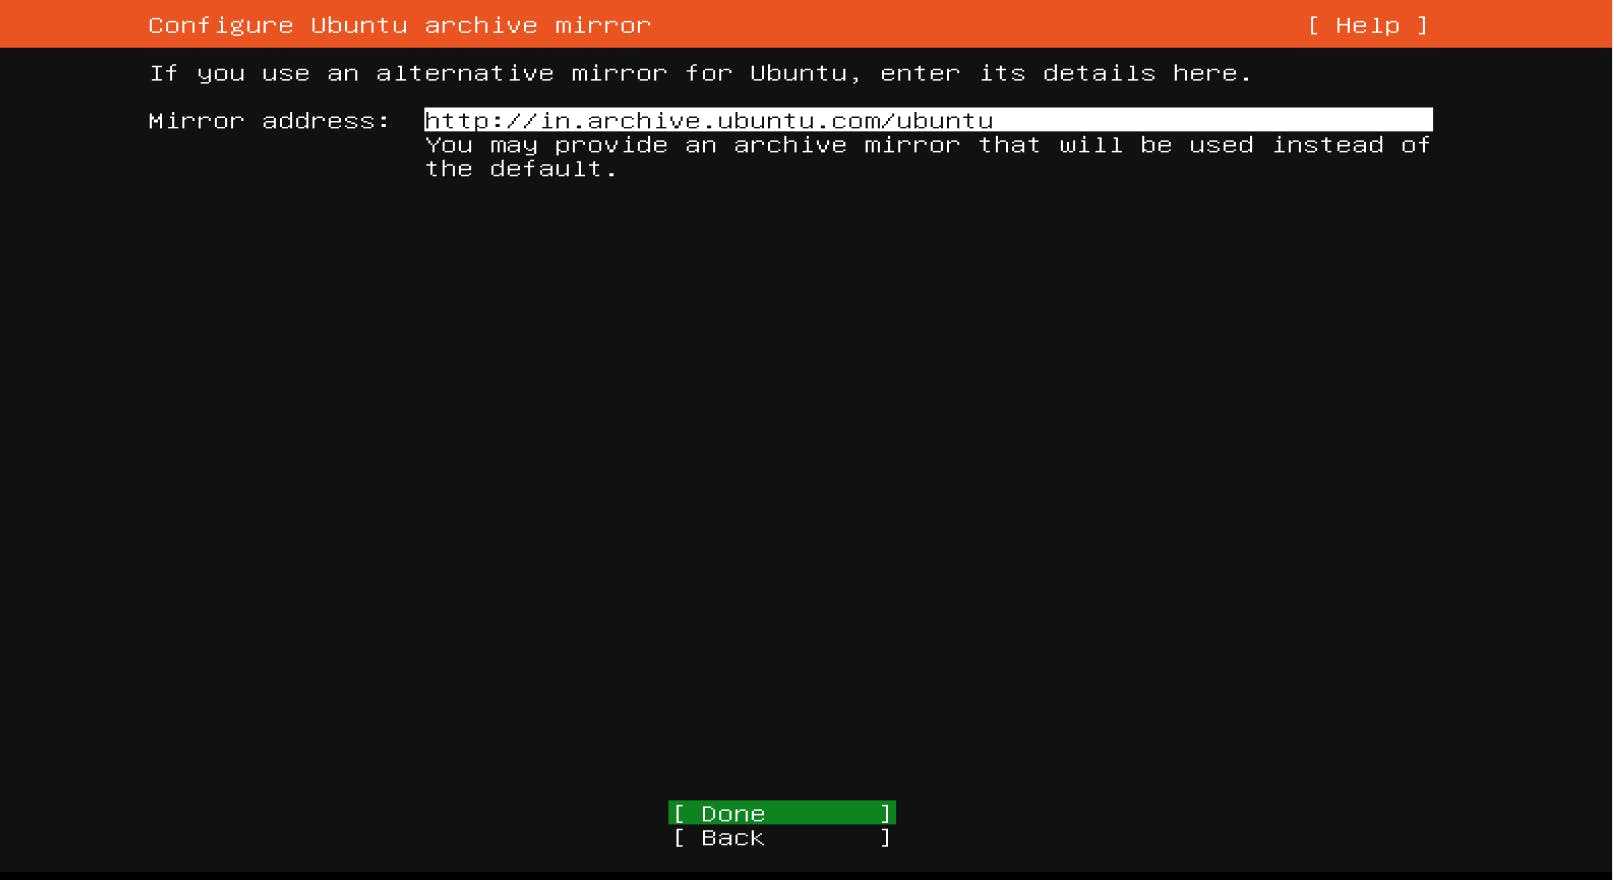
You can read more about Mirroring here.
Read how you can get the fastest download speeds for your packages using the correct mirror here.
Step 7: Storage Configuration
Now you need to set up your system's disk for installation. You need to configure it to use a part of, or the entire disk. I am selecting the entire disk, but if you prefer to dual boot or use only some some part of your disk for some other purpose, you can easily use the Custom Storage Layout option.
You can set up LVM (Logical Volume Manager) on your system to better manage your storage space. LVM is like a dynamic partition. You can create, resize, or even delete the partition, right from your terminal window, all while you are logged in, without the need to reboot the system. You can pop in more storage drives, and LVM will span over it. Read this article if you are unsure if LVM is the right choice for you.
After selecting Done, you'll be taken to this page:
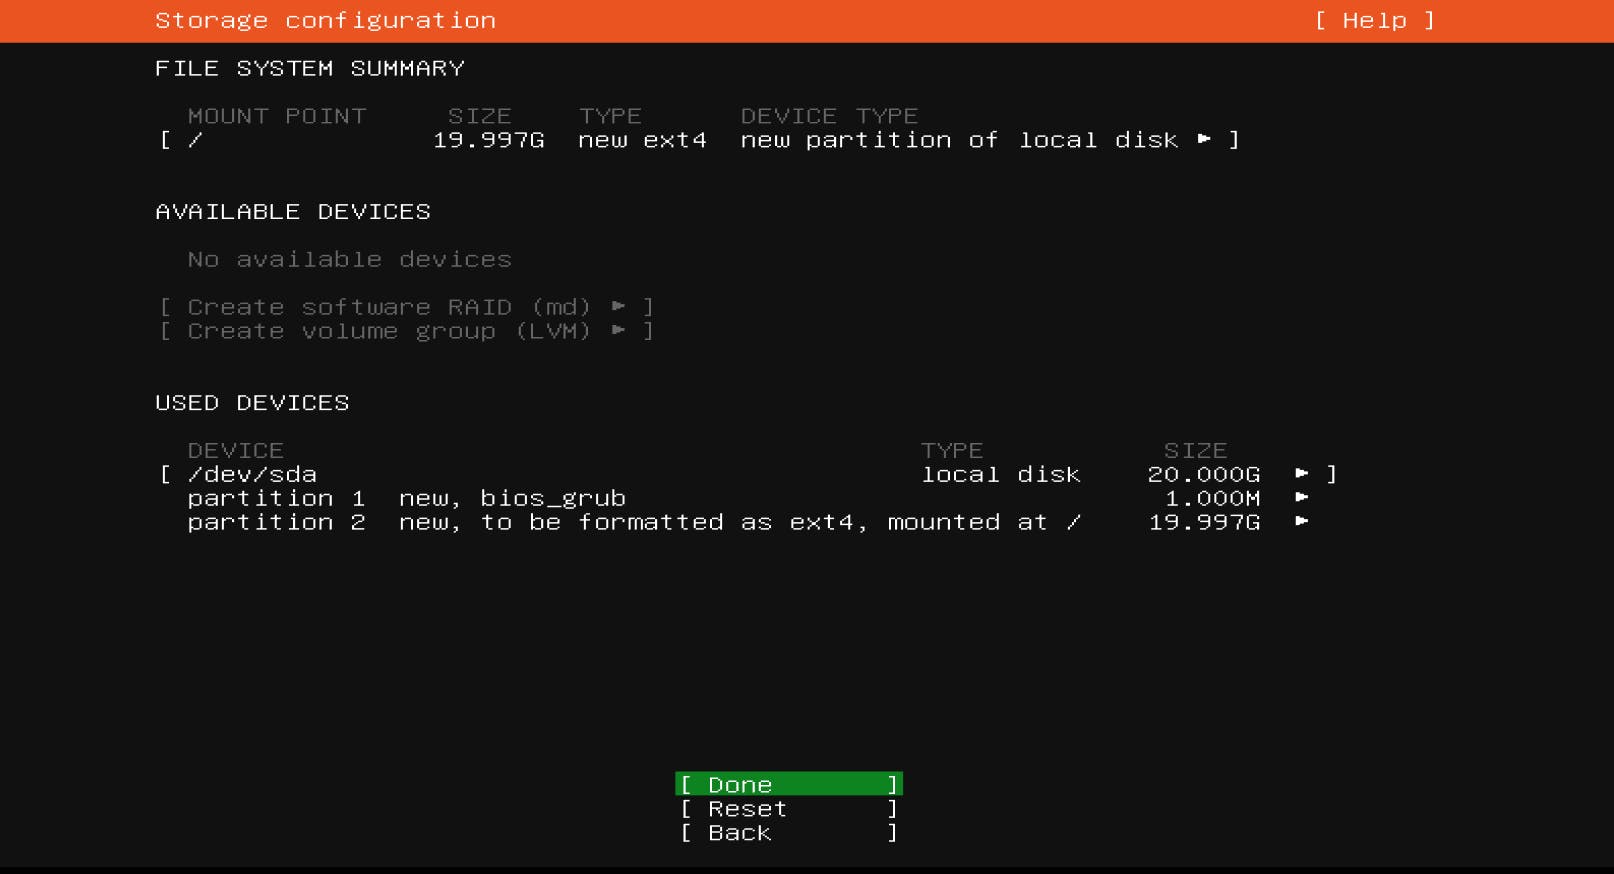 Here you can partition your drive accordingly and set up mount points. When you are done, you can proceed by pressing Done. A popup will show on your screen claiming this:
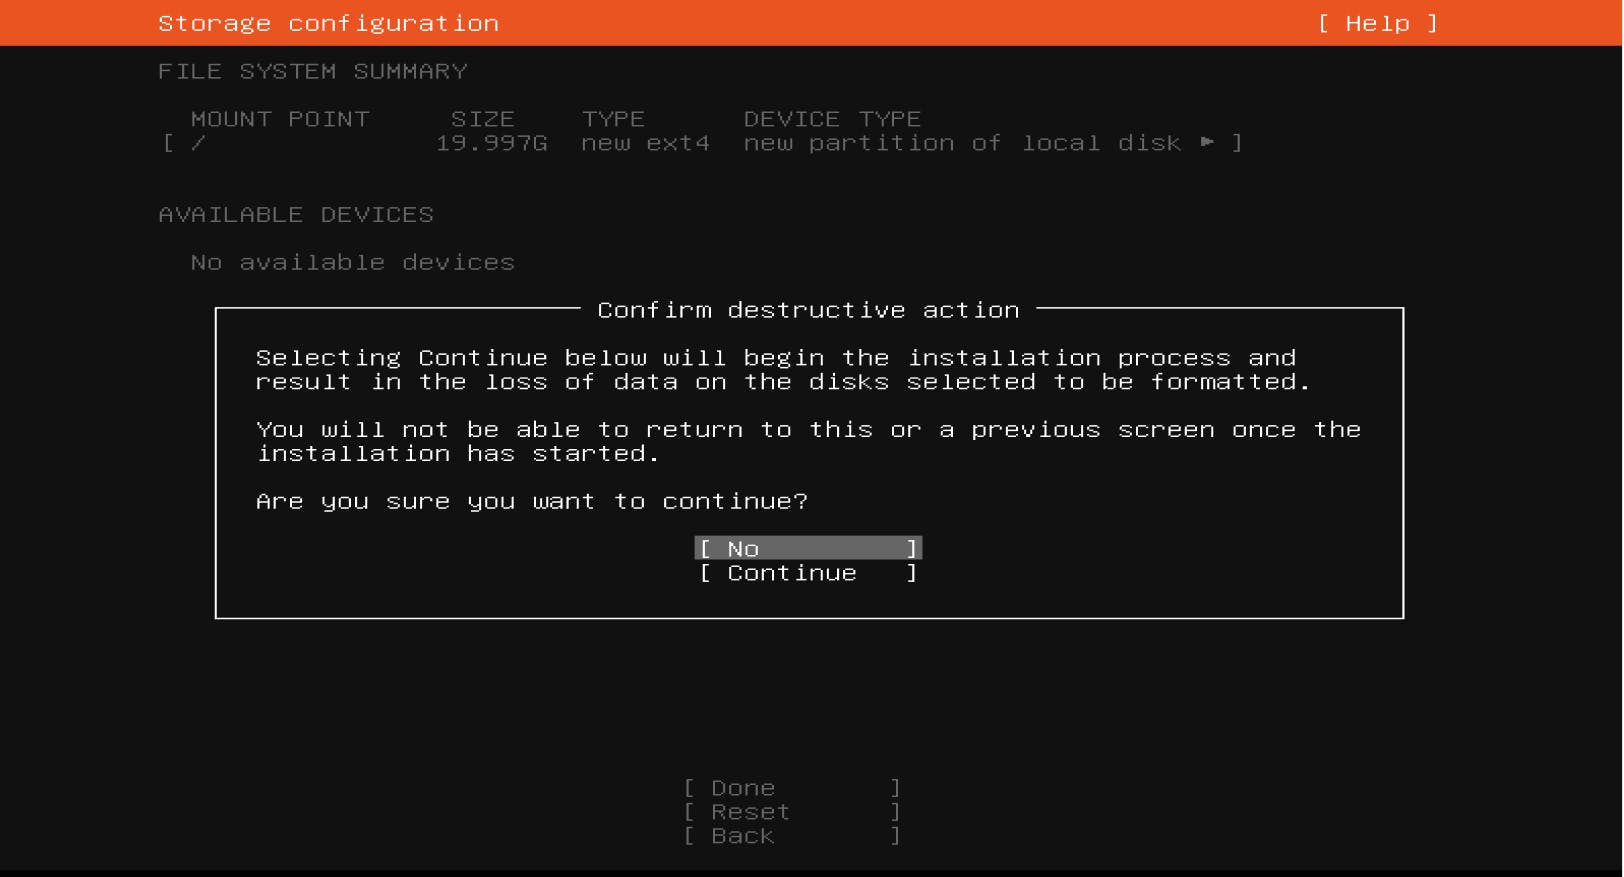 It is totally normal, and if you have partitioned your disk properly, you can proceed by pressing Continue.
Do keep in mind that you will not be able to return to this page or any previous installation page after this step.
It is totally normal, and if you have partitioned your disk properly, you can proceed by pressing Continue.
Do keep in mind that you will not be able to return to this page or any previous installation page after this step.
Step 8: Profile Setup
The installation has begun, but your part is not over yet. You need to create a user through which you can log in to the system.
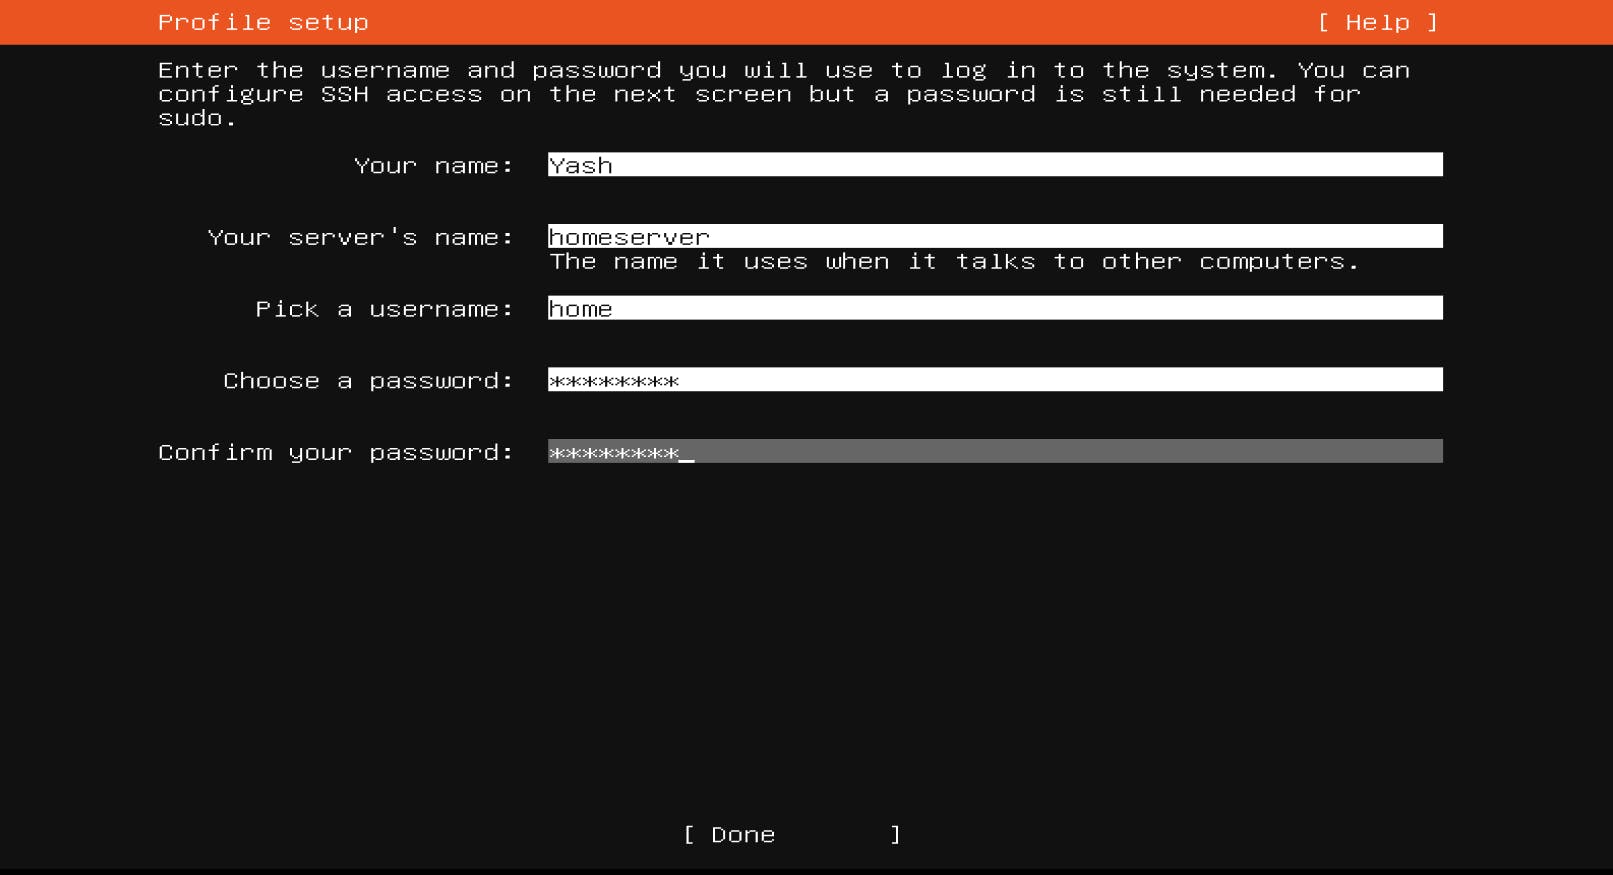 Enter your name, and then create a username followed by the password and your computer's hostname. The hostname will be the one with which your server will communicate with other computers. You can choose one which you can easily identify. When you are satisfied, press Done.
SSH Setup and Server Snaps
If you want to access your server remotely, you might want to install the OpenSSH server.
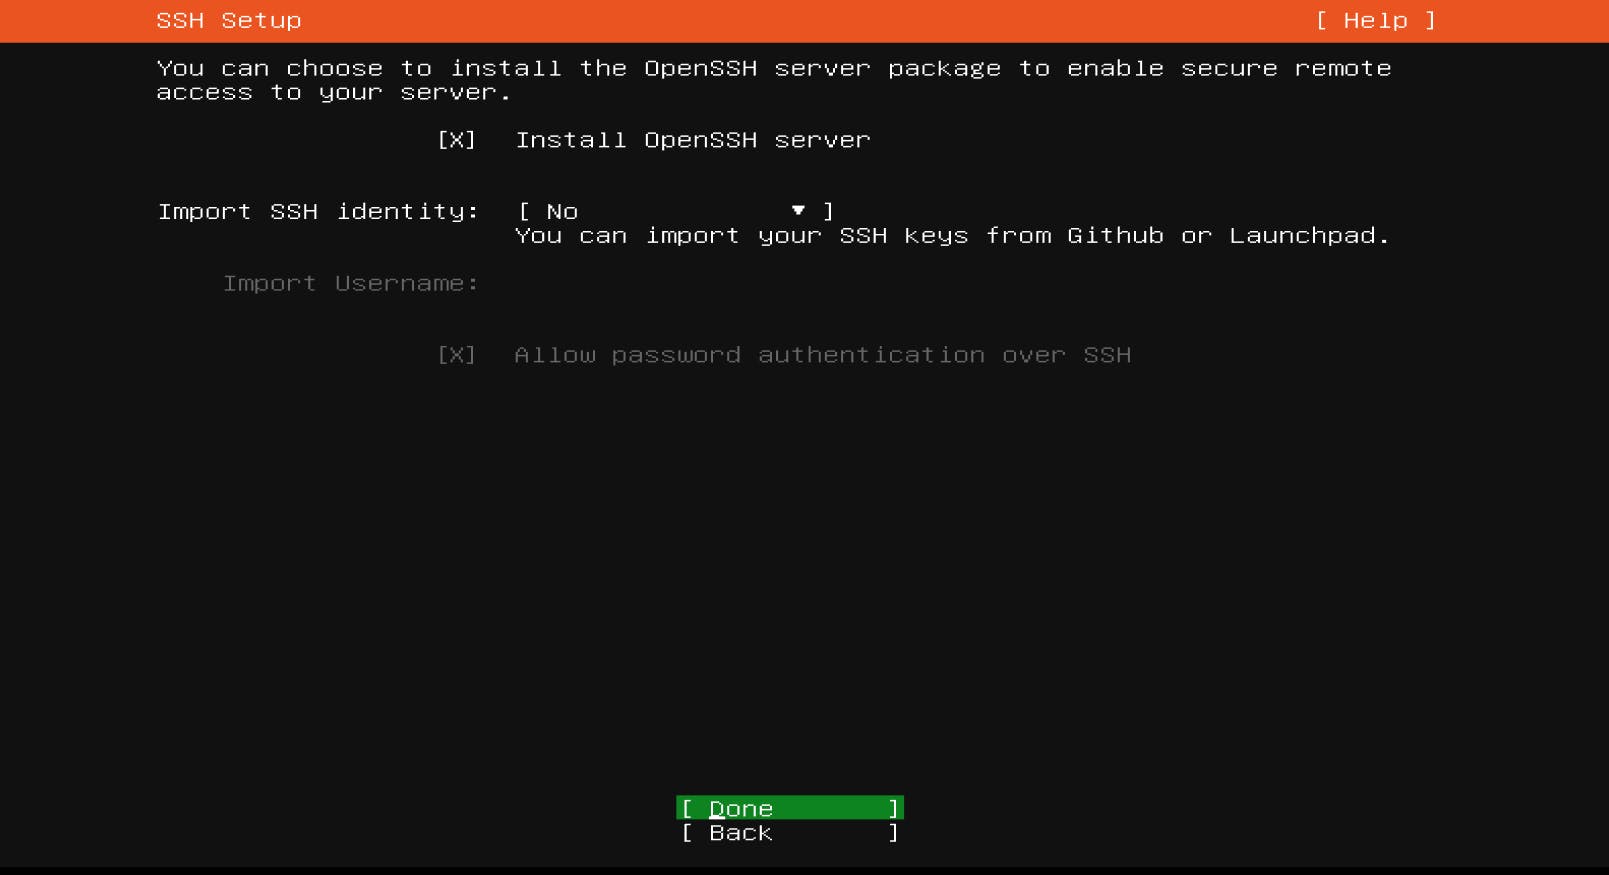 Select the Install OpenSSH server option by pressing
 Space when the option is highlighted and then press Done. You'll now be redirected to a page where you can install additional packages for your server. Choose whatever you like. You don't need to select one. You can altogether skip this step and press Done if you are not sure.
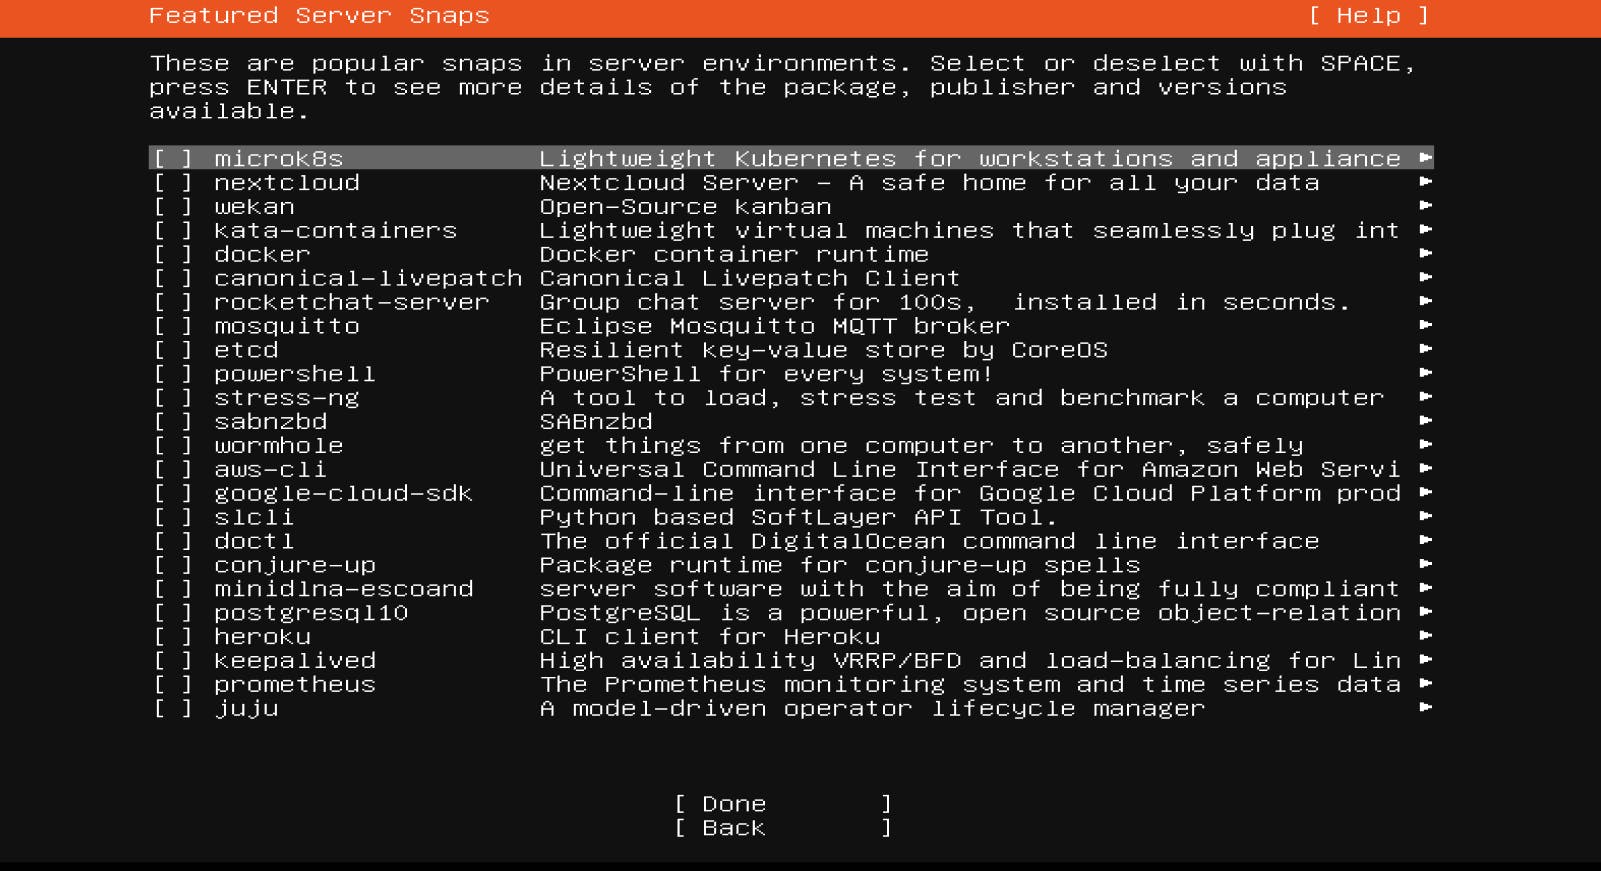 When you press Done, you'll be able to see the installation logs. Please wait for it to finish, and then select Reboot Now. Your system will restart, and you'll be able to see the Ubuntu Server Login prompt.
 If you have selected to install OpenSSH and other server snaps, you will not see the reboot option. You'll see the option 'Cancel update and reboot'. You will have to wait for those packages to be installed. The duration depends on your snap(s) size and your network connection. If you are not the patient type, you can go ahead and cancel the installation and proceed anyway. .'
Congratulations
Amazing, you just installed Ubuntu Server on your computer. A lot of amazing things await. You can install a reverse proxy package, a C-panel, host your websites, or even make an SMB server. Google your way to it, or wait for my next article.