What is AWS?
If you know what Infrastructure-as-a-Service (IaaS) means, you probably would know of AWS, Amazon Cloud Service. IaaS lets users sublet virtual networks, machines, storage, and servers, etc. AWS offers a suite of cloud-computing services that provides an on-demand computing platform. It is one of the best services you can find to deploy different applications to the cloud.
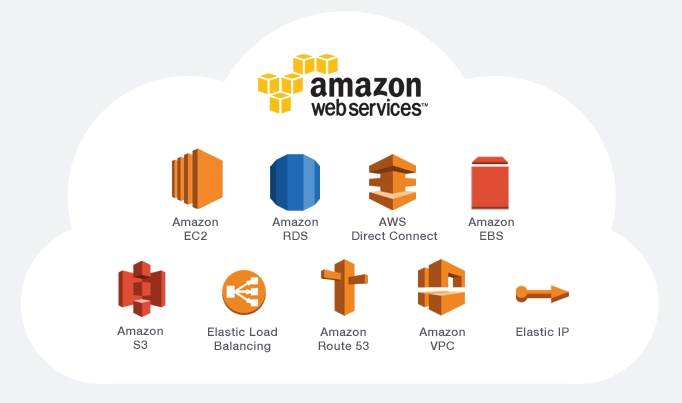
This AWS webpage explains in short what AWS is:
Amazon Web Services (AWS) is the world’s most comprehensive and broadly adopted cloud platform, offering over 175 fully-featured services from data centers globally. Millions of customers—including the fastest-growing startups, largest enterprises, and leading government agencies—are using AWS to lower costs, become more agile, and innovate faster.
Cloud computing has become necessary for businesses that provide a flexible, cost-effective, and on-demand storage service. Businesses need not set up high-maintenance, expensive servers for their need. All they need to do is rent it. Now, you'd be thinking, why should I choose AWS over others?
- AWS features a pay-as-you-go model, so you only pay for what you use.
- AWS has been around the longest, right from 2006.
- There are 24 regions and 77 availability zones globally.
- Choice of Intel, AMD, and Arm-based processors
- They recently added support for macOS, the first, and to date, the only cloud provider to do that.
- Some of the major services AWS provides include Amazon Cloud Front, Amazon Elastic Compute Cloud (EC2), Amazon Relational Database Service (Amazon RDS), Amazon Simple Notification Service (Amazon SNS), Amazon Simple Queue Service (Amazon SQS), Amazon Simple Storage Service (Amazon S3), Amazon SimpleDB, and Amazon Virtual Private Cloud (Amazon VPC). With so many options to choose from, it has become a popular choice among multiple developers and users.
What is EC2?
 The Amazon Elastic Compute Cloud, also known as EC2, is a web service that provides secure, resizable compute capacity in the cloud. These servers, commonly known as the Instances, allow developers to access the global AWS data centers' compute capacity. These instances are virtual instances of whatever machine configuration you want to run on the cloud. You can have a Ubuntu Server running with 8 gigs of storage and 4 gigs of memory, or a Windows Server running 8 gigs of memory and a 50 gigs storage. It's all customizable.
In this article, we are going to set up an EC2 Ubuntu instance, free of cost. Learn more about the AWS Free Tier.
How to create an AWS account?
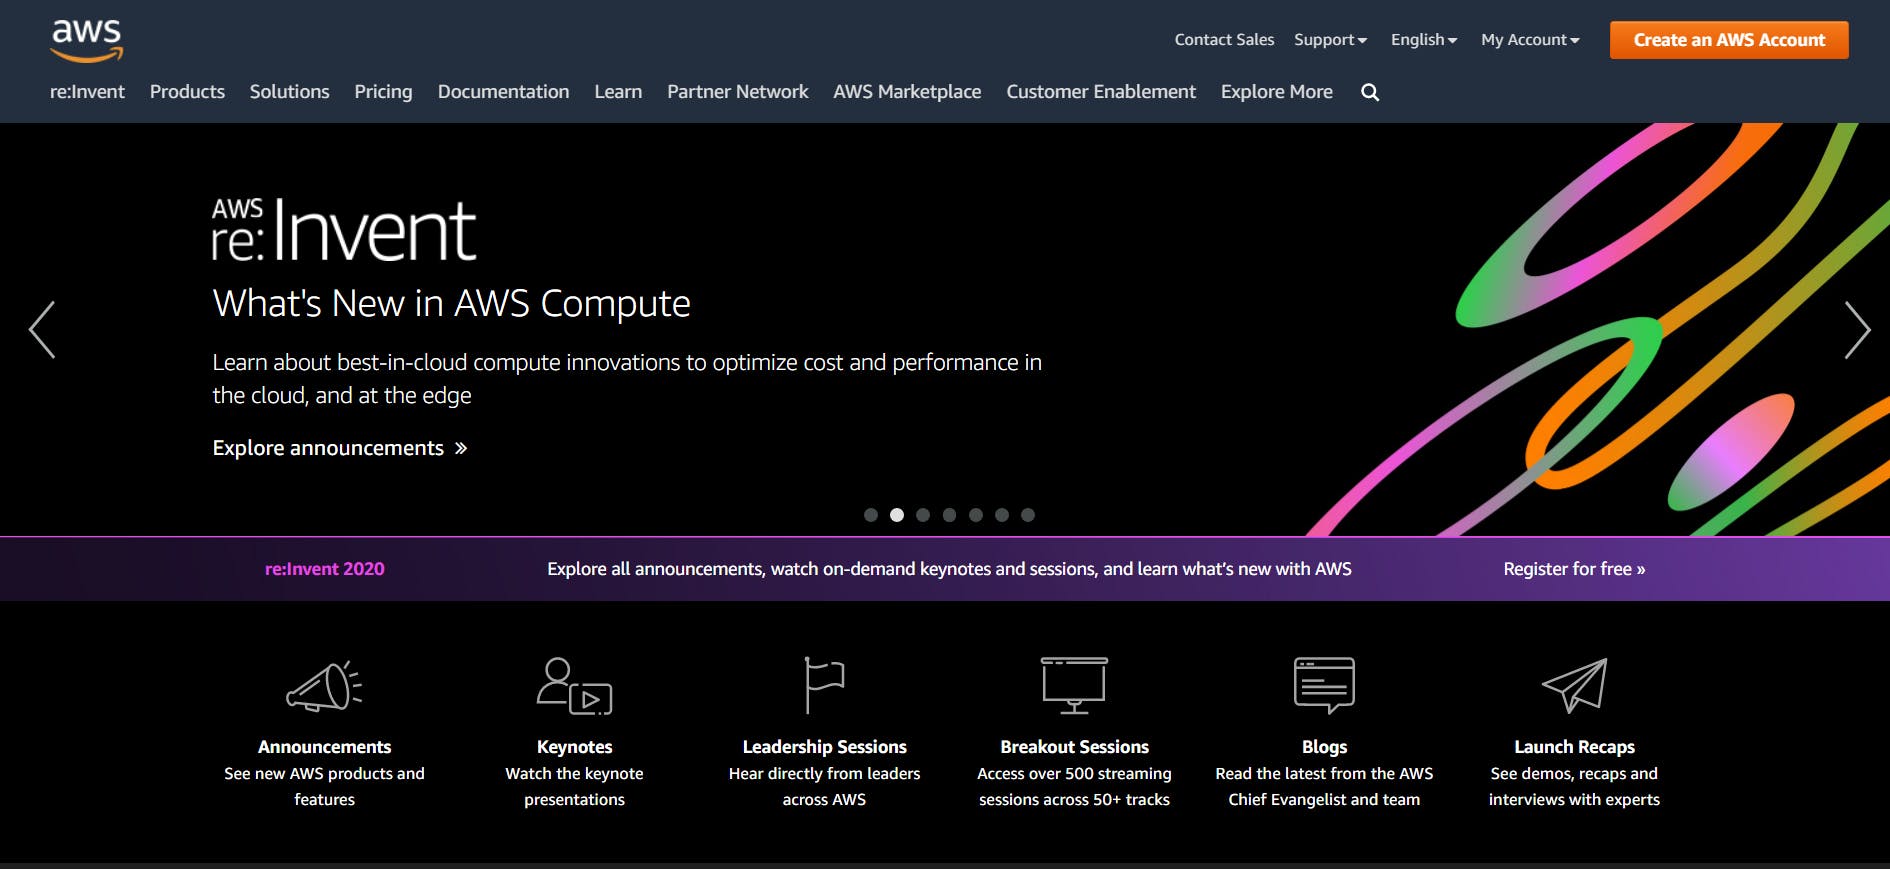
Before we launch an EC2 instance, you'll need an AWS account. First, open up aws.amazon.com and click on the Create an AWS Account button on the top right corner of the web page.
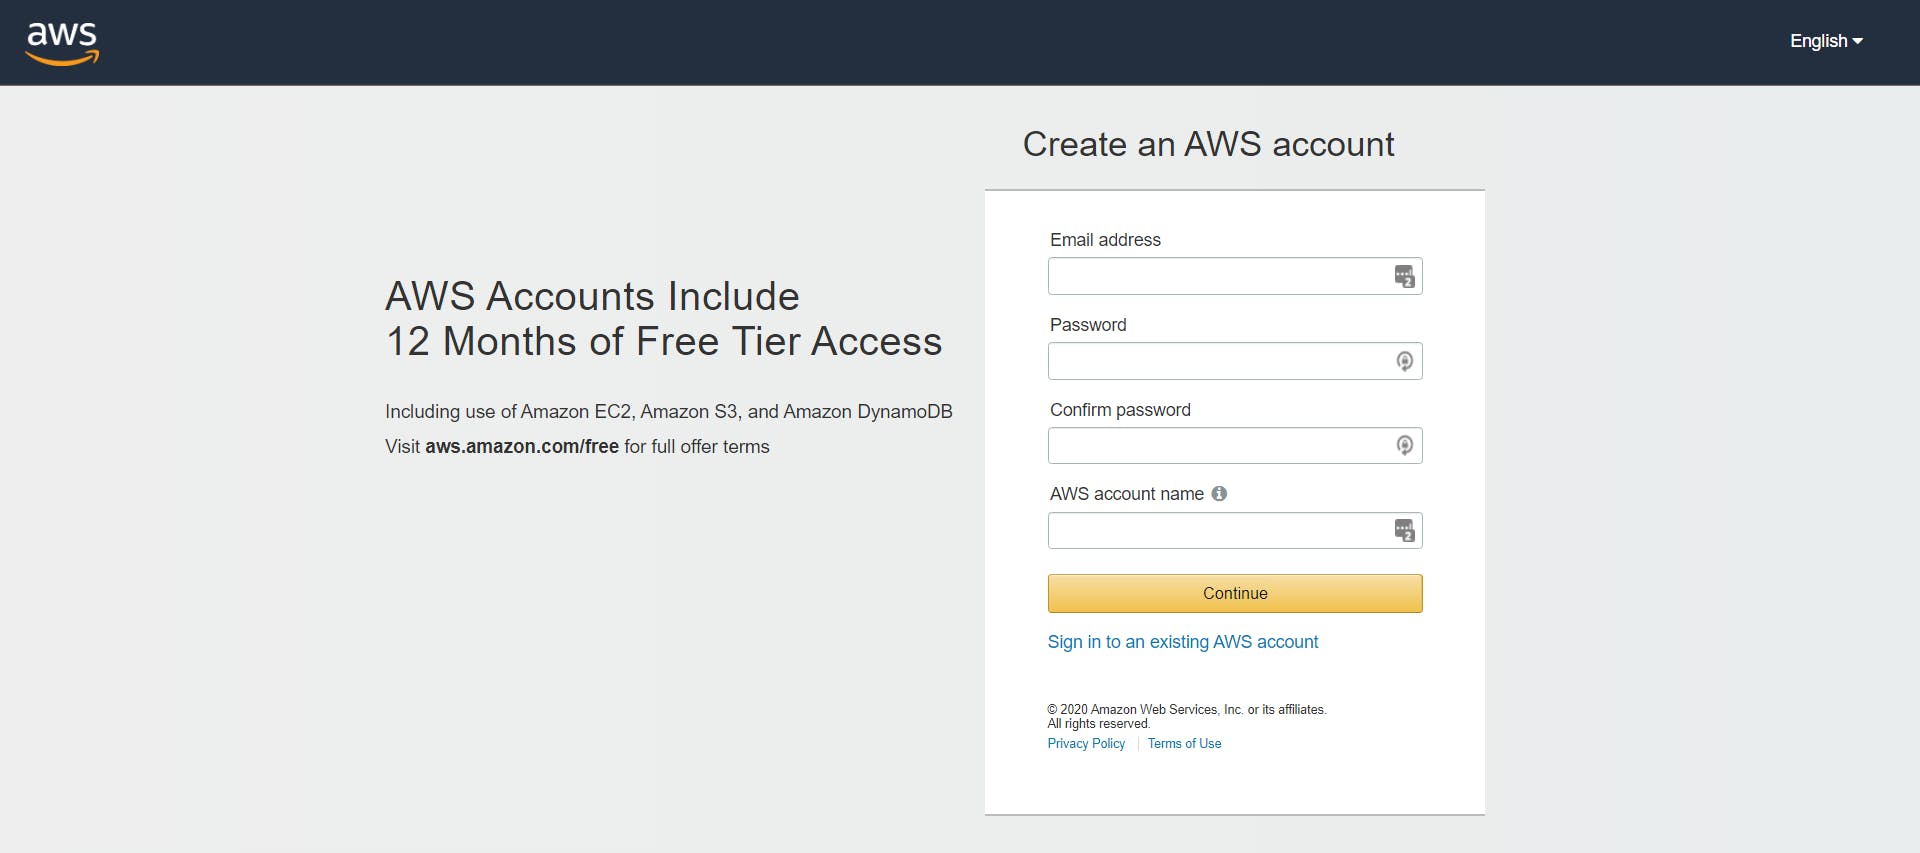
You create an account by filling out all the fields on this page and following through. It is a pretty straightforward process.
 As you continue filling the form, you'll be asked to fill in contact details, billing details (don't worry, Amazon will charge you just ₹1 for verification purposes), followed by phone verification. Finally, you can choose a plan for your account among the Basic, Developer, and Business options. The free tier is included in the Basic plan.
Do remember to change the account type to Personal on the Contact Information page. After you are done, you can sign in to your AWS Console. If you are stuck somewhere, you can refer to the video below. (Click on it)
 Or, if you are more of a reading person, you can refer to this article.
How to set up an EC2 instance?
Login to your AWS Console with the account you just made (or an existing one).
You should have reached a page that looks like this:
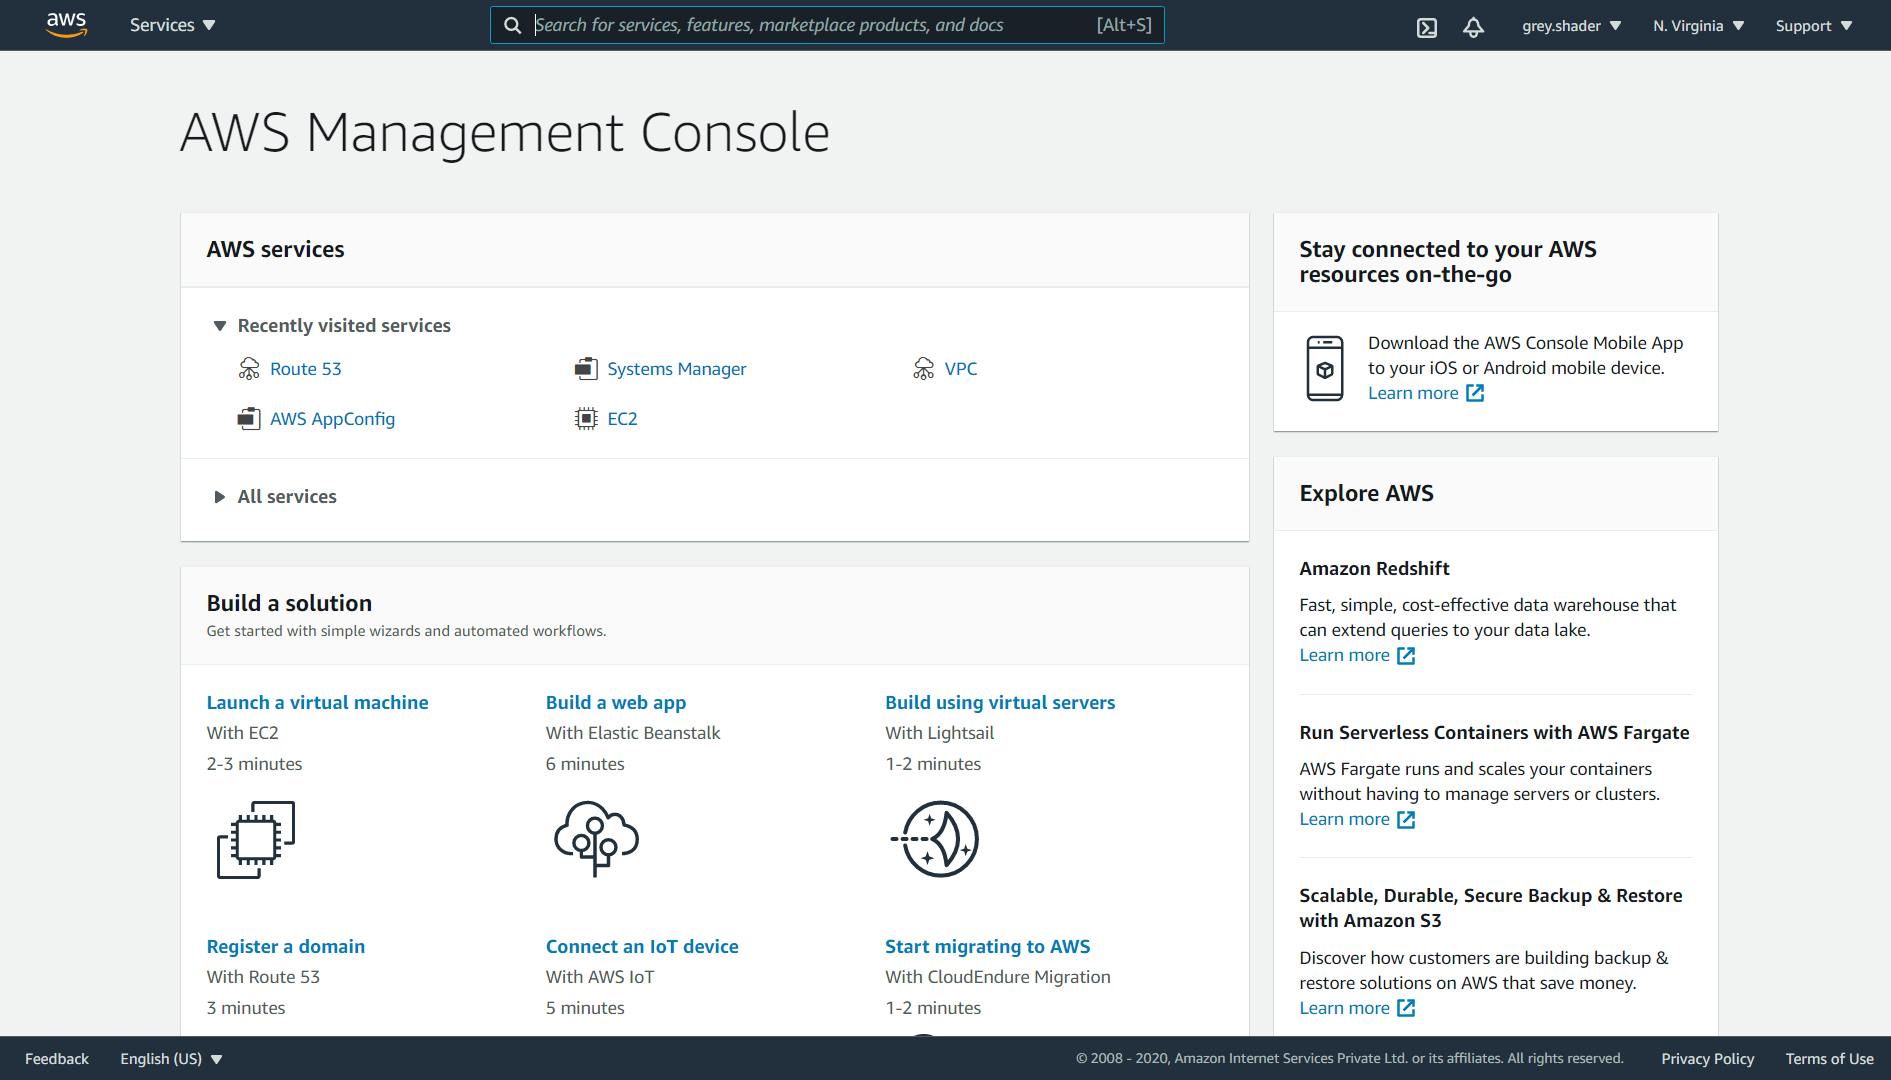 You can see the Launch a virtual machine option in the Build a solution container. This is what we will be setting up.
Step 1: Selecting an AMI
After you have clicked on the Launch a virtual machine link, you'll be redirected to a page that lets you choose an AMI (Amazon Machine Image), or in amateur words, an Operating System. There are so many options to choose from, including the recently included macOS. But do keep in mind that not all AMIs will fit your free tier plan. Only those with a Free tier eligible banner below them are included for the 12-month free period. I'll be choosing the Ubuntu Server 20.04 LTS AMI for this tutorial, but you are free to choose any. If you pay close attention, you'll also see an option to choose the AMI architecture you'll be using. You can either use a 64-bit ARM or a 64-bit x86 architecture. I will stick to the default x86 option and click on the blue Select button.

Step 2: Your instance type
Next, you'll be able to customize the AMI according to needs. The first thing that comes after selecting an AMI is choosing an instance type. There are so many options here, but I will be selecting t2.micro. You can see the details about a particular type of instance in the fields adjacent to it, in the same row.
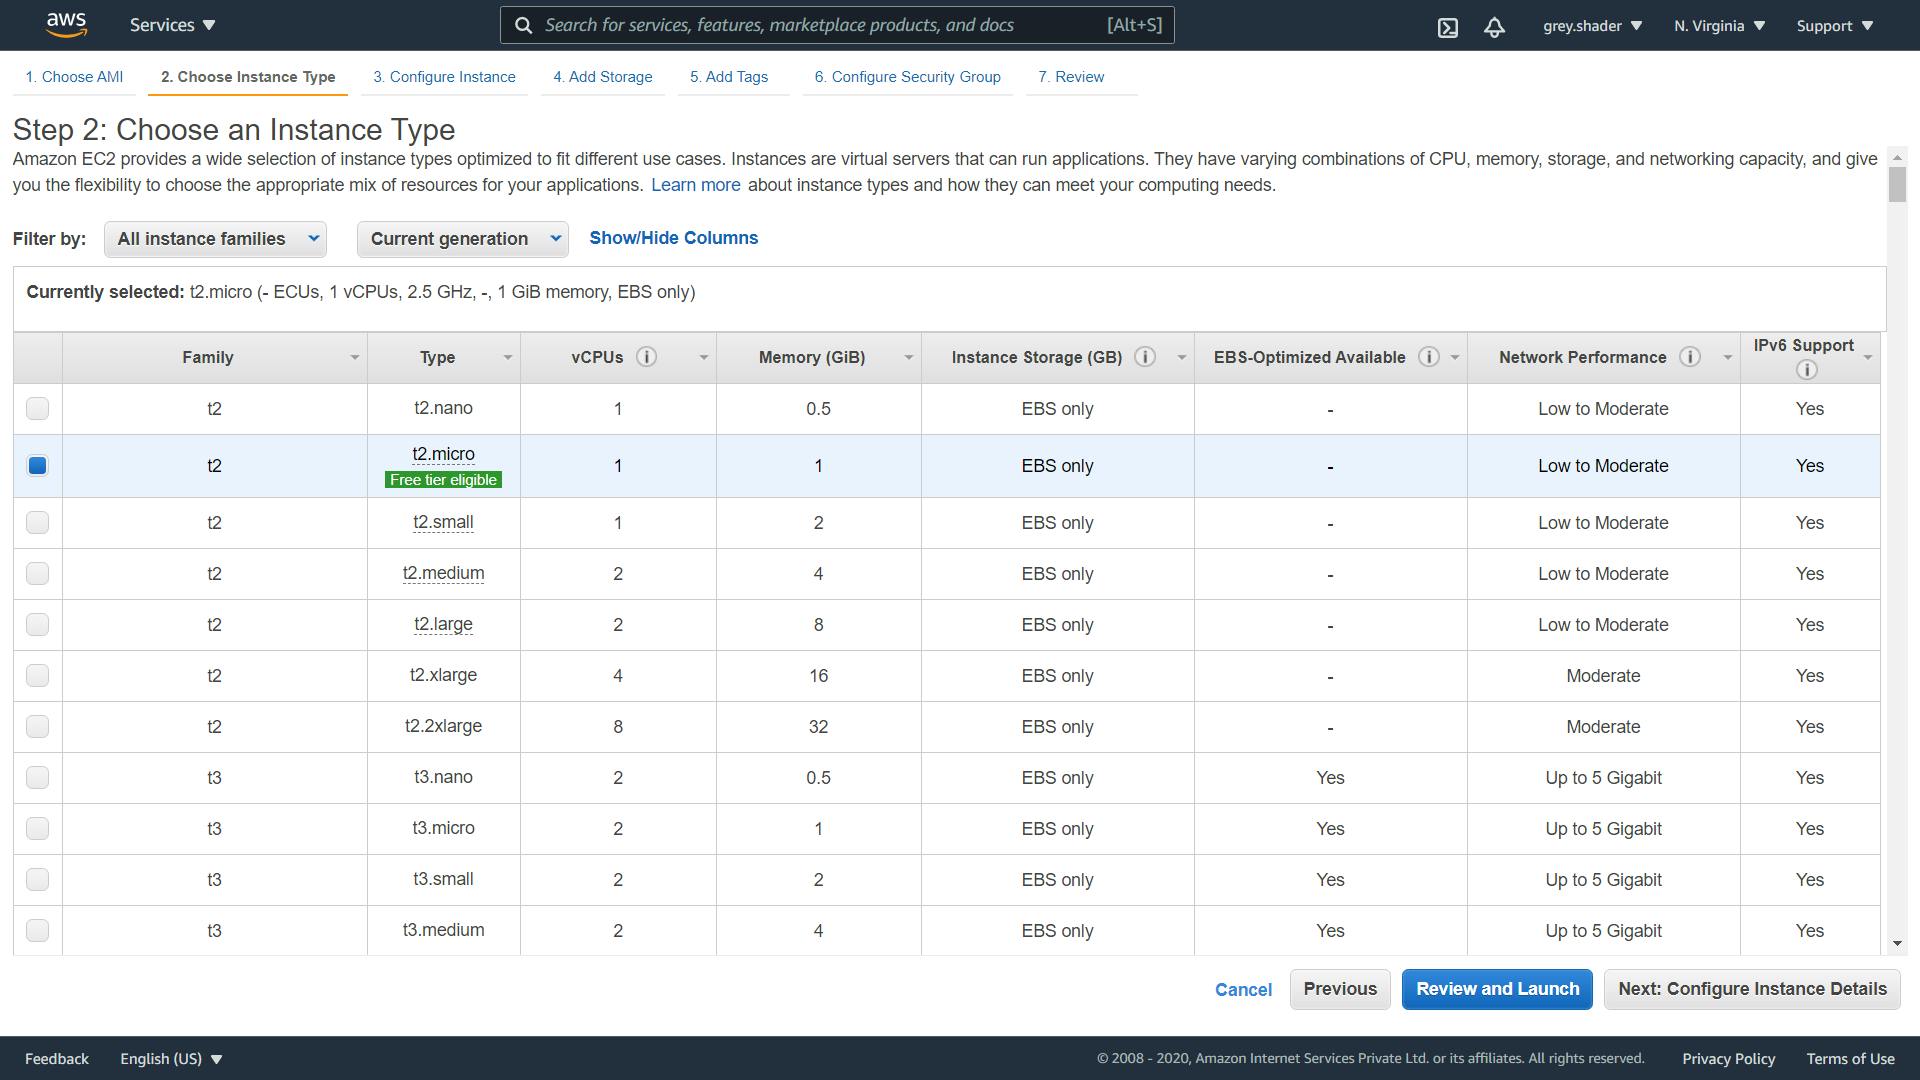
Click on the Next: Configure Instance Details button on the bottom right of the page.
Step 3: Configuring your Instance
On the Configure Instance Details page, you can set up your AMI according to your needs. I will leave everything to default, but you can change the settings if you are familiar with the settings. You can read about what each option does by hovering over the i button next to the label.
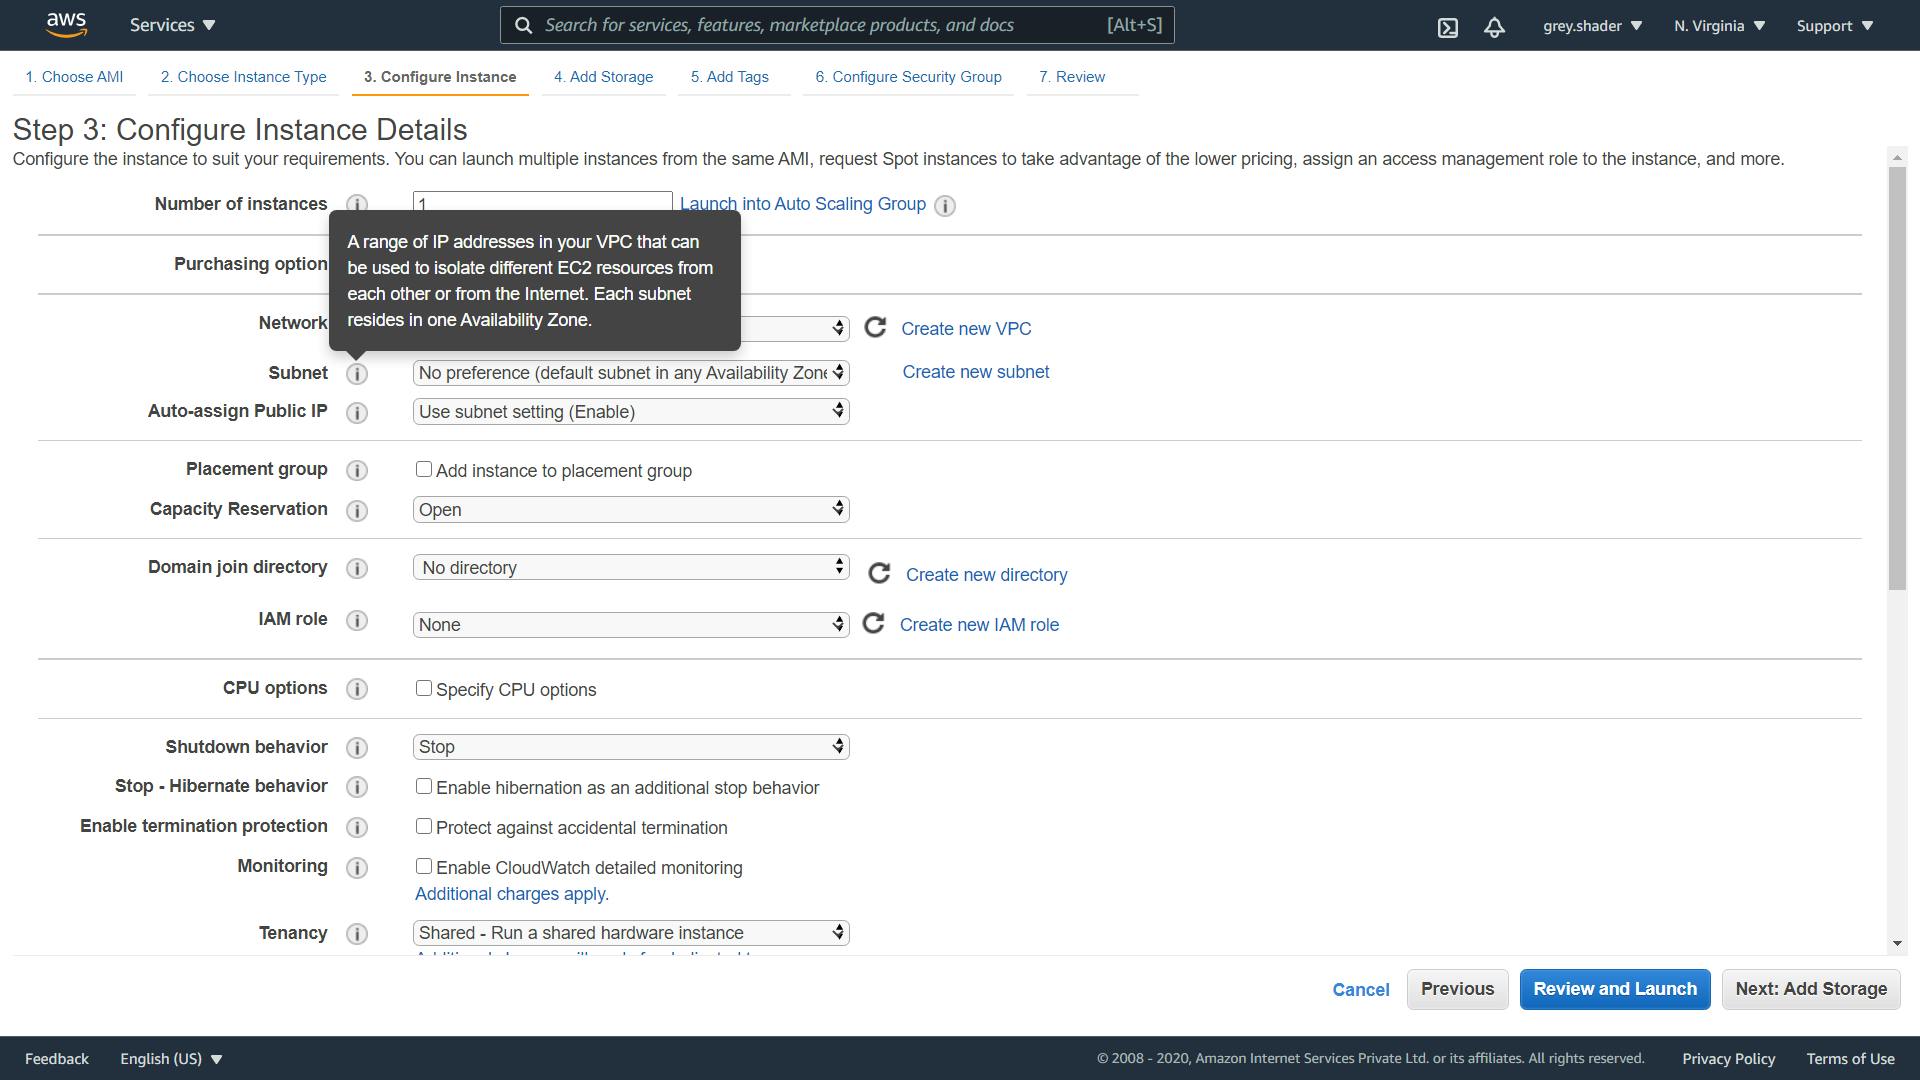
After making the changes (if you do any), click on the Next: Add Storage button on the bottom right.
Step 4: Allocating disk space to your AMI
Now, let's do the storage allocation. When the Add Storage window opens, you'll have an option to configure the storage size, the type of storage, and the encryption settings on the AMI. You can add multiple storage volumes on your Machine Image, but the total cannot exceed 30 GB for free-tier users.
Free tier eligible customers can get up to 30 GB of EBS General Purpose (SSD) or Magnetic storage. Learn more about free usage tier eligibility and usage restrictions.
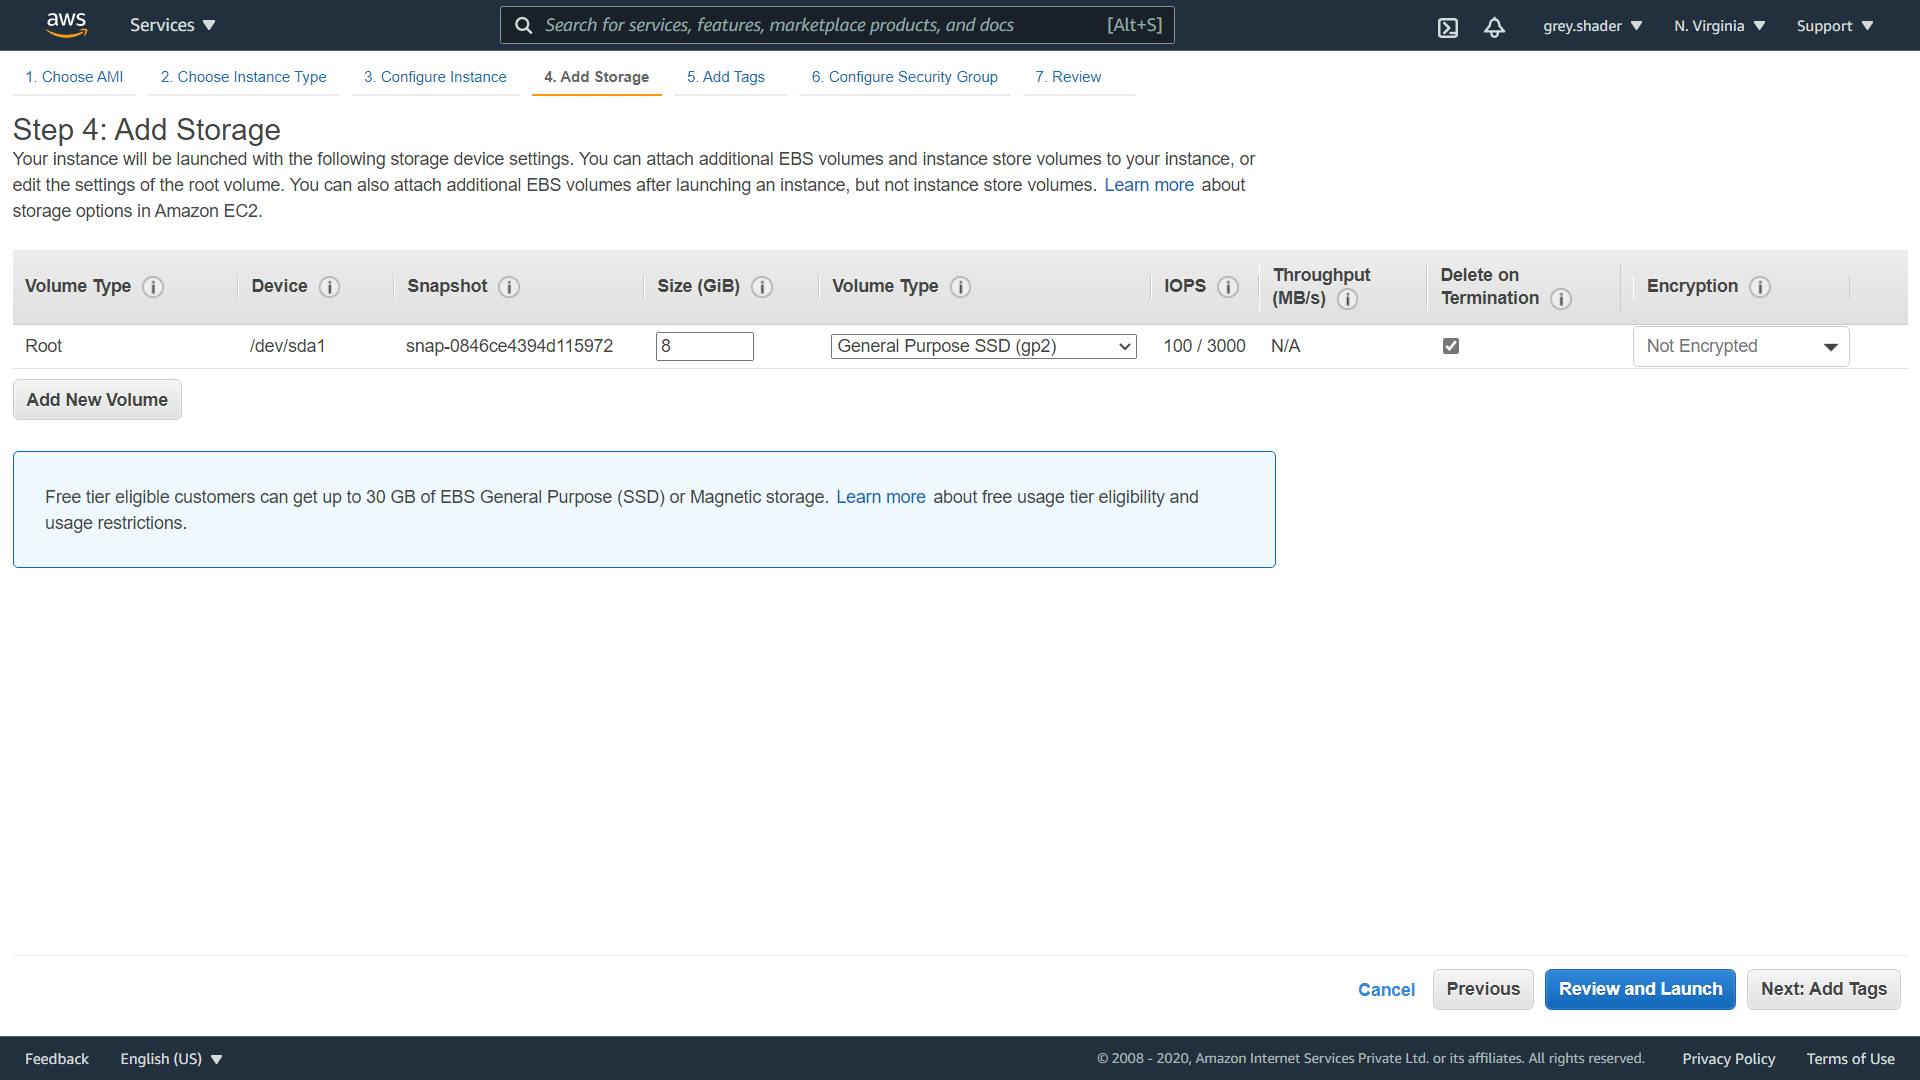
I am leaving the storage setting on this page as default as well, giving 8 GB of storage to my Ubuntu Machine, which in my view is more than enough if I am not running a website that requires to store a lot of data. After you are done setting up your storage volumes, click on the Next: Add Tags button on the bottom right.
Step 5: Adding Tags
The next step is adding tags to your AMI. Tags are used to label an AWS resource. A tag consists of a key-value pair which helps in identifying the resource. More about that over here.
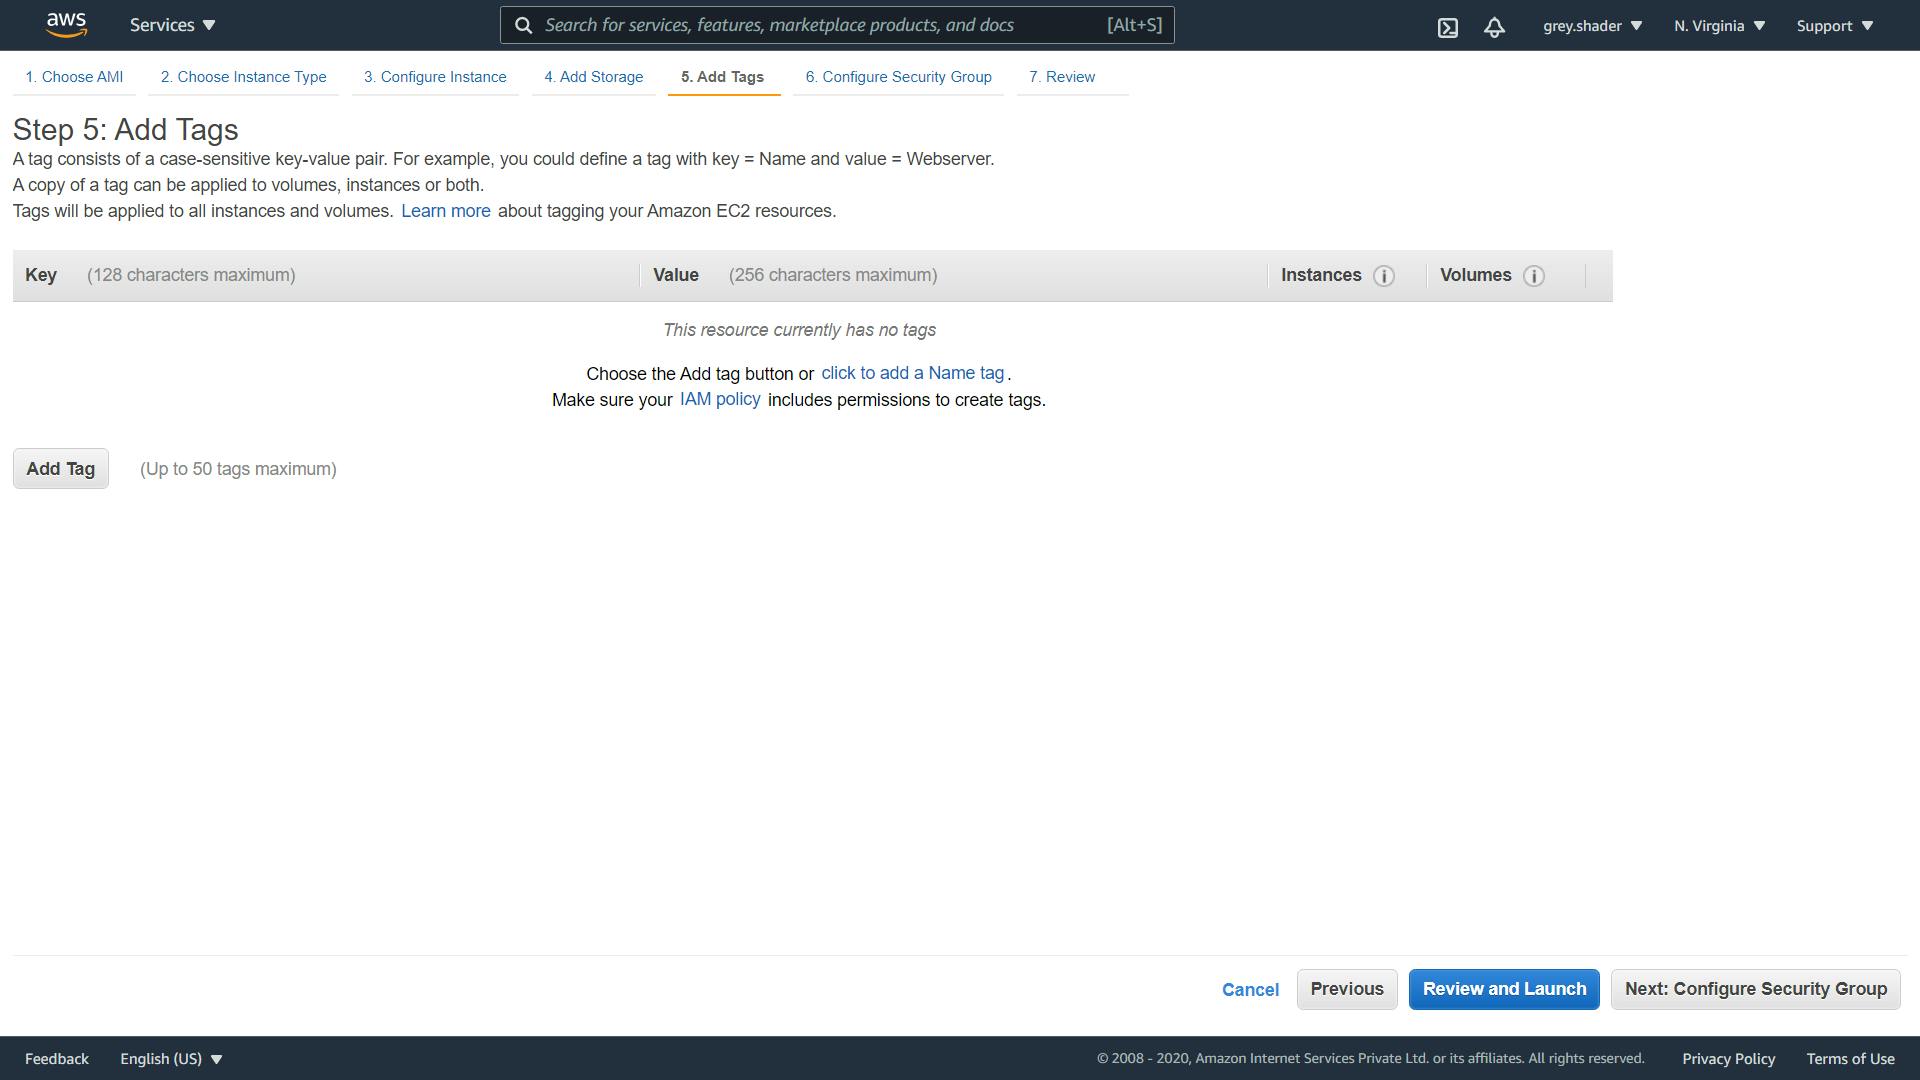
I won't be adding any changes here because I will not be needing to label resources for this tutorial. Click on the Next: Configure Security Group button to proceed.
Step 6: Configuring Security Settings
Configuring Security Settings is a crucial setting you might not want to miss while creating an instance. By default, port 22 is open for SSH access, but I will also open port 80 for HTTP, and port 443 for HTTPS so that my website (which I will set up in a follow-up article) can be viewed. You can also open any custom port according to your needs.
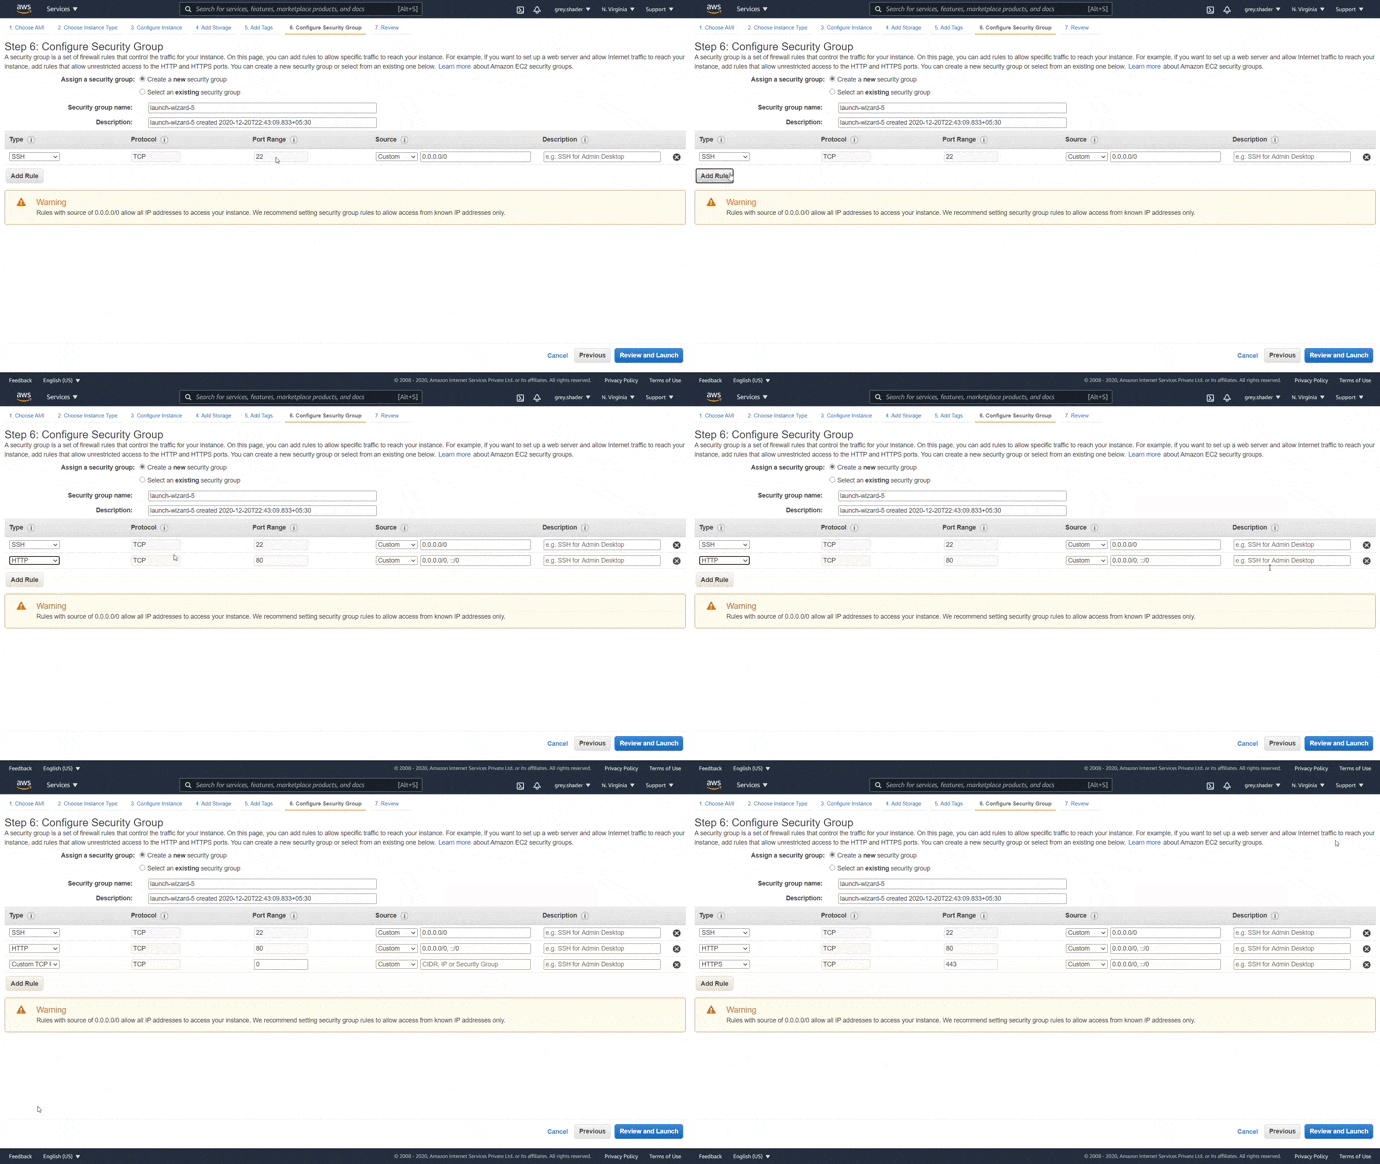
In the source field, set the dropdown to anywhere so that you can access your machine from anywhere in the world. However, if you have a static IP and you want only a computer with that IP to SSH into that AMI, you can set it up to match that IP address, by selecting the Custom option from the dropdown.
After you are done setting up the security group, click on the blue-colored Review and Launch button on the bottom right. We are almost done.
Step 7: Launching your AMI
Now, you can review all the configurations you have chosen for your AMI. If you see nothing wrong with the configurations, you can click on the Launch button at the bottom-right of the screen.
After you do that, you will be asked to create a new or select an existing key pair so that you can access your AMI using an SSH client. You need to keep this file safe.

Click on Launch Instance after you are done. If you created a new key-pair, your file download will start and the instance will begin to be created.
Step 8: Your EC2 Dashboard
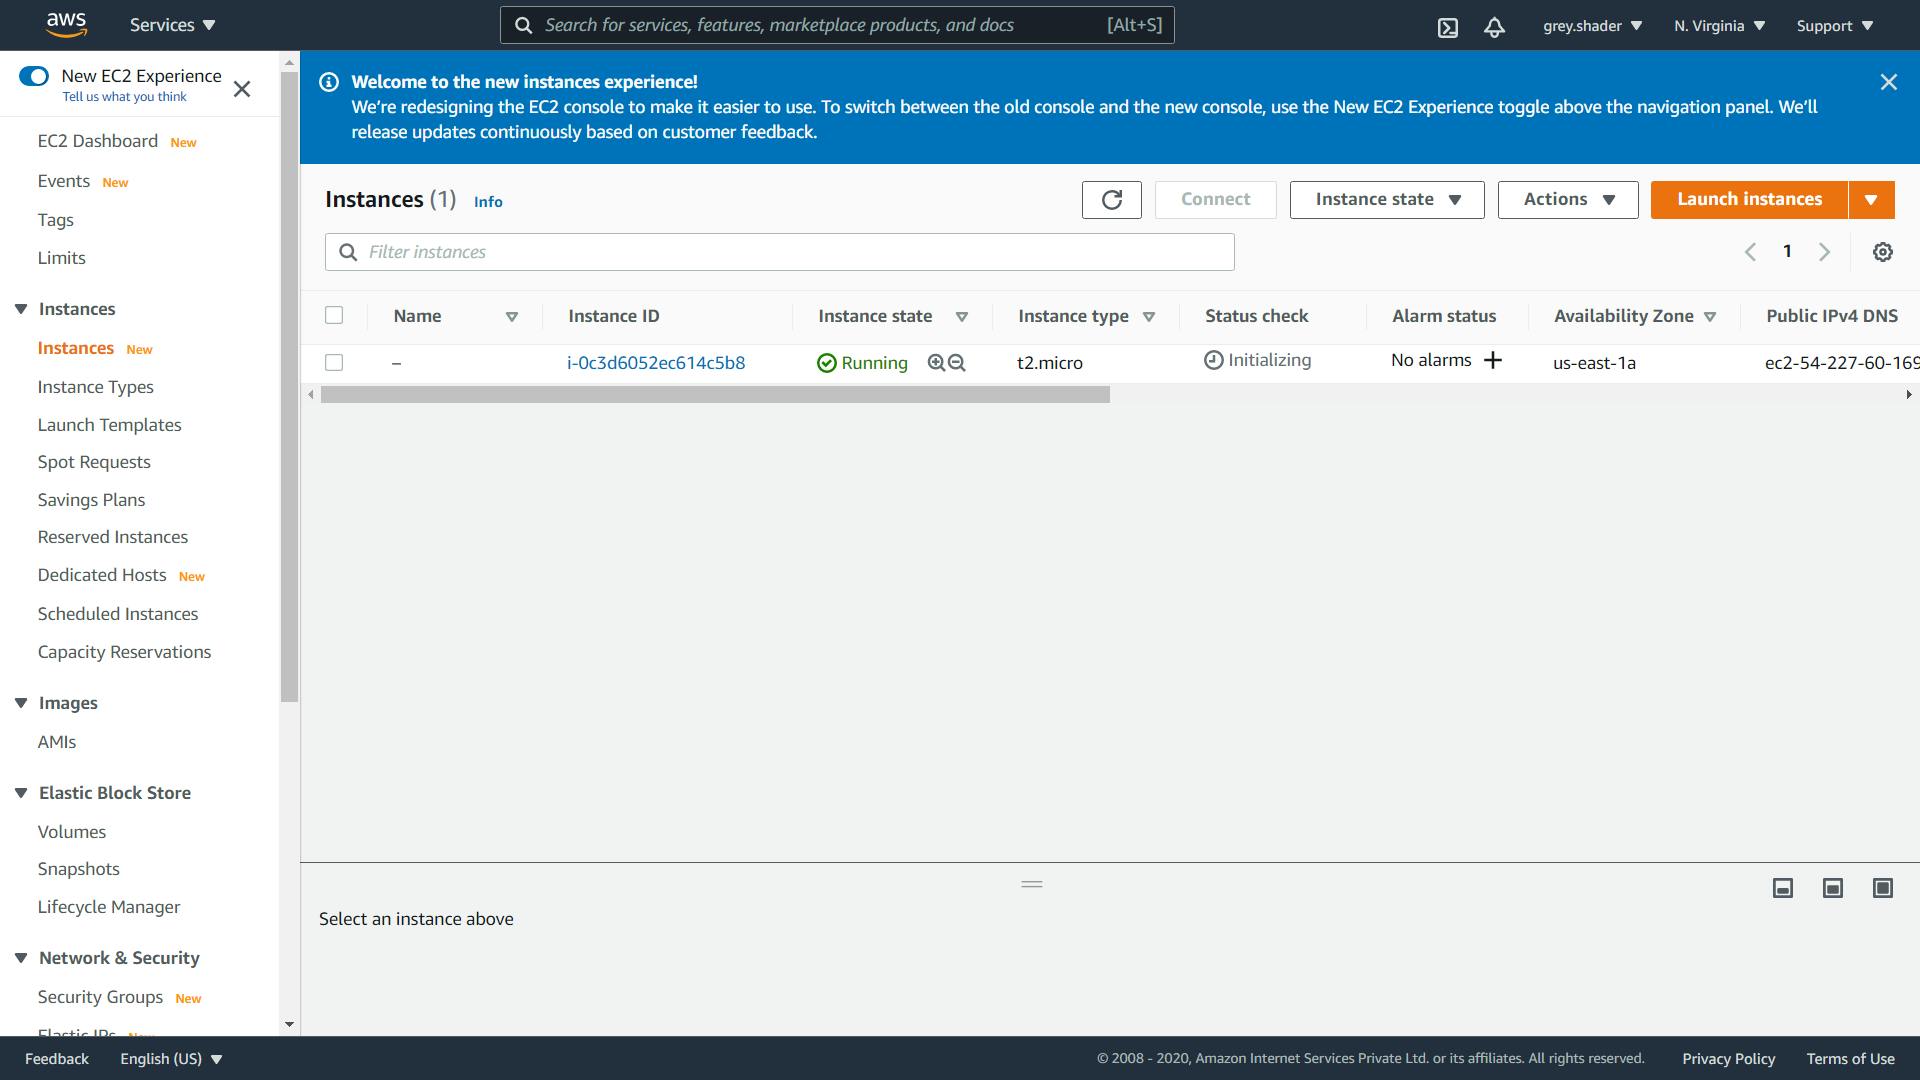
You can now see the launch status on your screen. Click on the View Status button at the bottom of the screen. You will be redirected to the EC2 Dashboard from where you can manage your instance and find details about it.
Wrapping up
Well, you have successfully created your first EC2 AMI. Congratulations. Yay! You are free to experiment with the EC2 dashboard. Explore different tabs and Google your way around. Remember to Stop (not terminate) your instance when you are not using it to save credits.
I will create a follow-up article explaining how to connect with your instance and serve multiple web applications using Nginx soon. Watch out.
Thanks
Hope you found this article informative and intriguing. If it helped you, do give it a like 🧡 and share it with people who might find it useful. Also check out my Instagram and Facebook pages for more content.


